Spring Boot Web Application Deployment on AWS Elastic Beanstalk with AWS RDS
This post briefly documents the process of deploying a Spring Boot based web application on the AWS Elastic Beanstalk platform. This application will be connected to an AWS managed MySQL Relational Database system.
Introduction
AWS Elastic Beanstalk is an orchestration service offered by Amazon Web Services for deploying applications which orchestrates various AWS services, including EC2, S3, Simple Notification Service, CloudWatch, autoscaling, and Elastic Load Balancers.
Amazon Relational Database Service (RDS) is a distributed relational database service by Amazon Web Services. It is a web service running "in the cloud" designed to simplify the setup, operation, and scaling of a relational database for use in applications.
Goals
- Amazon Relational Database Service (MySQL) Creation and Configuration
- AWS Beanstalk - Creating Environment
2.1 Create a new environment
2.2 Select environment tier
2.3 Create a web server environment
2.4 Environment information
2.5 Platform
2.6 Application code
2.7 Log - Edit inbound rules for the web app deployed on Elastic Beanstalk to access the Database
- Environment Overview
4.1 Environment setup complete
4.2 Application
4.3 Configuration
4.4 Monitoring
4.5 Events - Output
5.1 Web Page
5.2 API Endpoint
5.3 API In Action - Cleanup
6.1 Terminate Environment
6.2 Confirm Environment Termination
Minimum Requirements
- Access to AWS Management Console
Sample Project
Spring Boot Minimal Web App is the sample Spring Boot web application i've used to deploy on the AWS Elastic Beanstalk platform.
Application URL
Navigate to http://localhost:8080/ to discover the application URLs.
Building the Executable Jar
Find details on how to build an executable jar here.
Configuration
-
In the
application.propertiesfile present in theresourcesfolder, set thespring.profiles.activevalue tomysql-aws. -
In the
application-mysql-aws.propertiesfile, set theserver.portvalue to5000. Also, set theaws.rds.database.endpointvalue in the same file to the database endpoint generated after following the steps in the next section.
Noticed an issue with this Sample Project? Open an issue or a PR on GitHub!
Step 1 - AWS RDS MySQL Creation and Configuration
Refer the following post detailing the process of creating MySQL Database via the AWS RDS service. This is an essential part of the process since the sample application will be connected to a relational database.
https://anantharajuc.github.io/aws-relational-database-mysql/
Step 2 - AWS Beanstalk - Creating Environment
Step 2.1 - Create a new environment
Navigate to the AWS Elastic Beanstalk console, click on "Create a new environment"

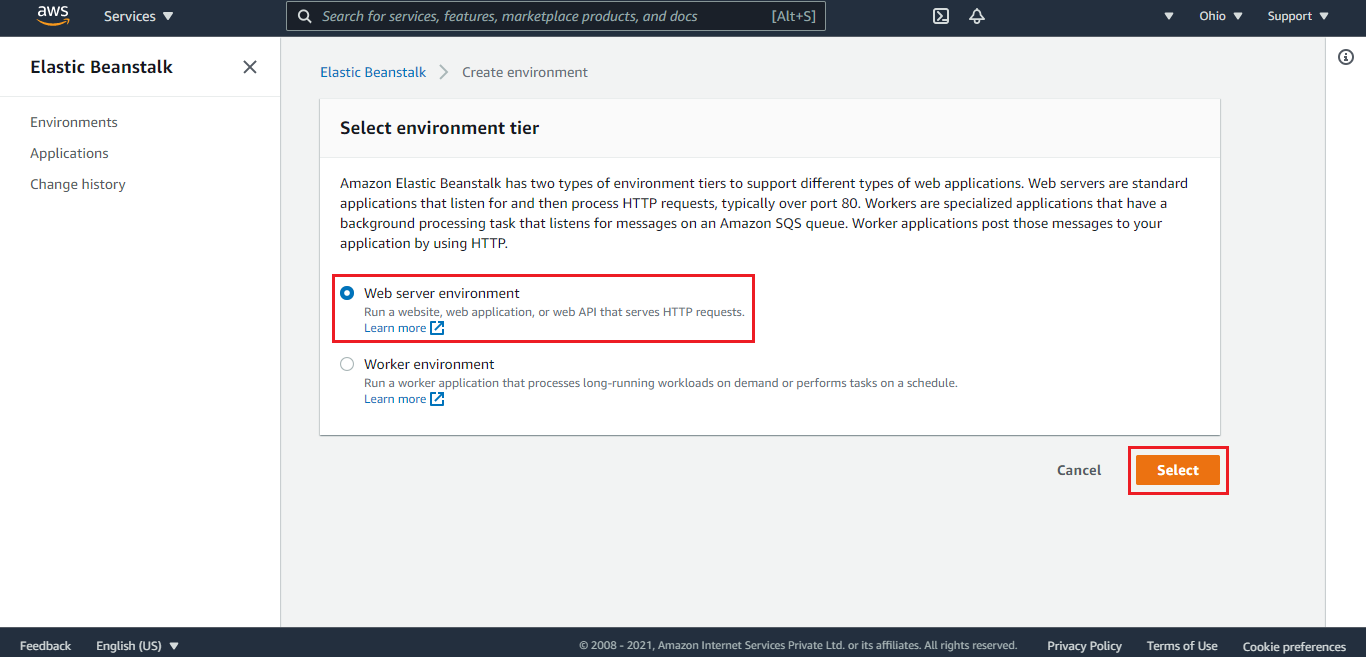
Step 2.2 - Select environment tier
Choose the appropriate environment tier based on your application's requirements.
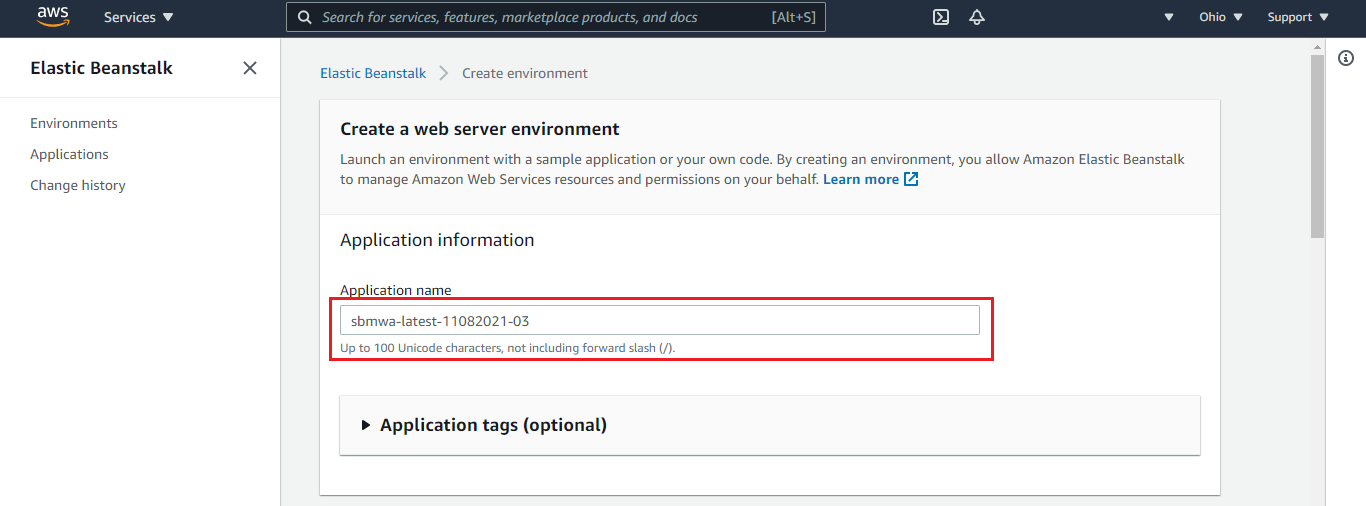
Step 2.3 - Create a web server environment
Provide the necessary details to create a web server environment.
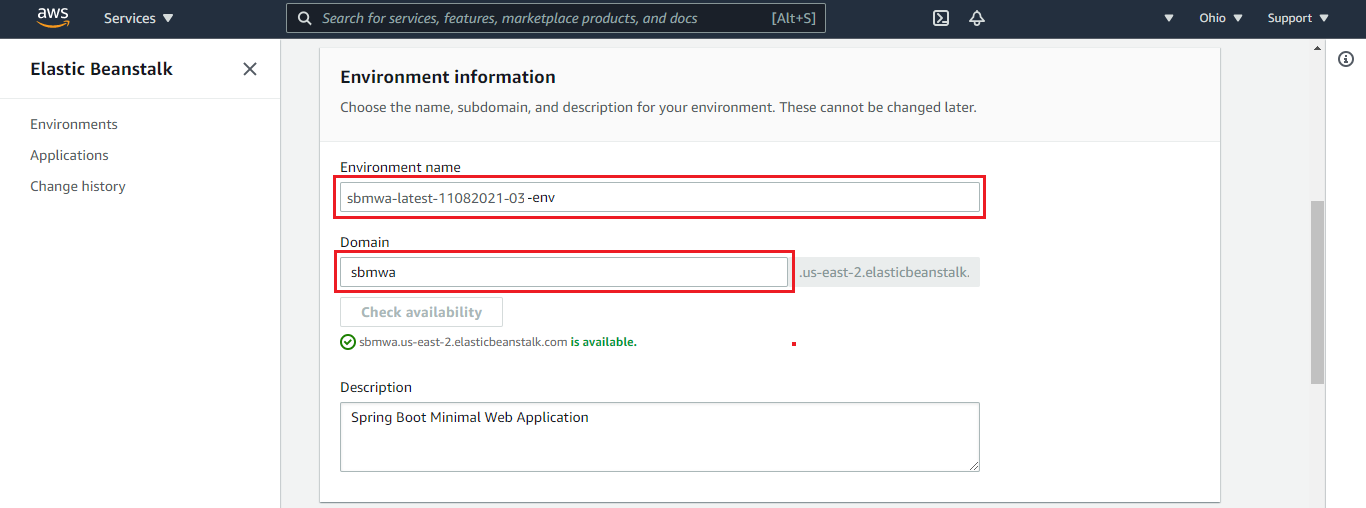
Step 2.4 - Environment information
Enter the required information about your environment, including the environment name, domain, and description.
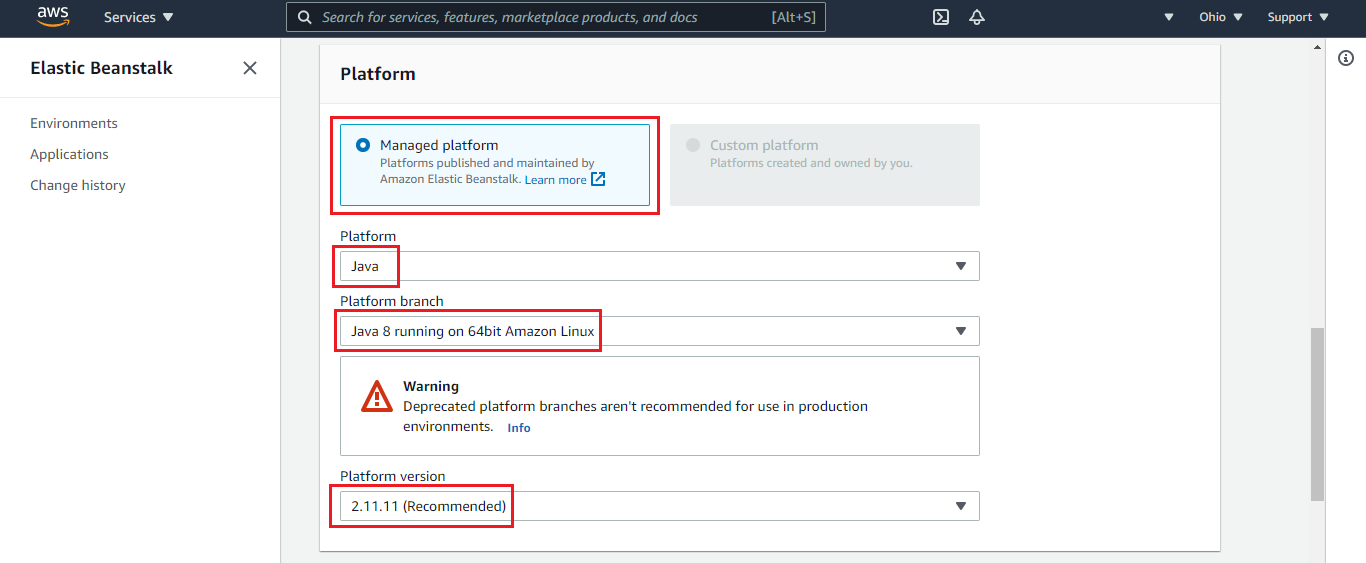
Step 2.5 - Platform
Select the platform for your application. For a Spring Boot application, you can choose a Java platform.
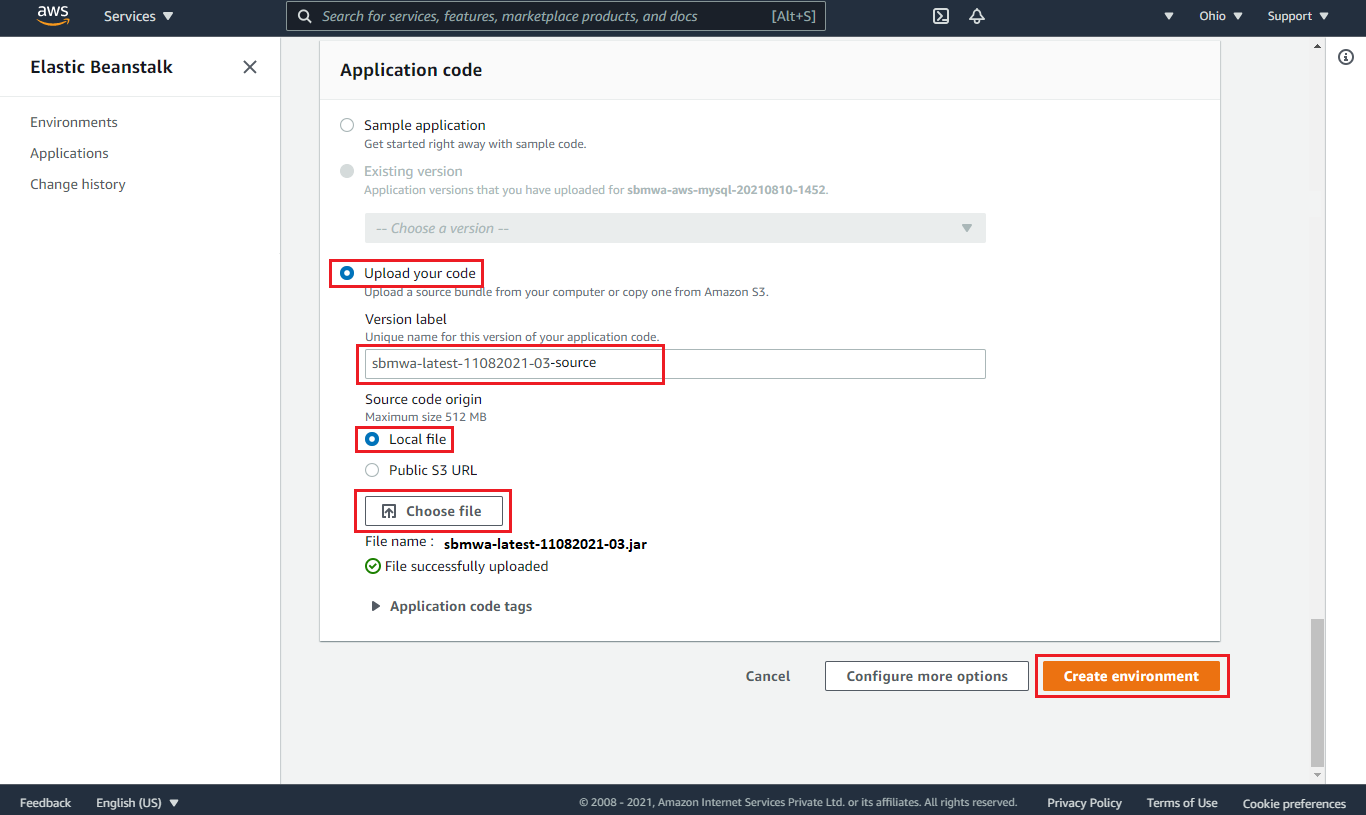
Step 2.6 - Application code
Upload your Spring Boot application's executable jar file or a ZIP file containing your application code.
Step 2.7 - Log
After deploying your application, review the logs to ensure everything is running smoothly.

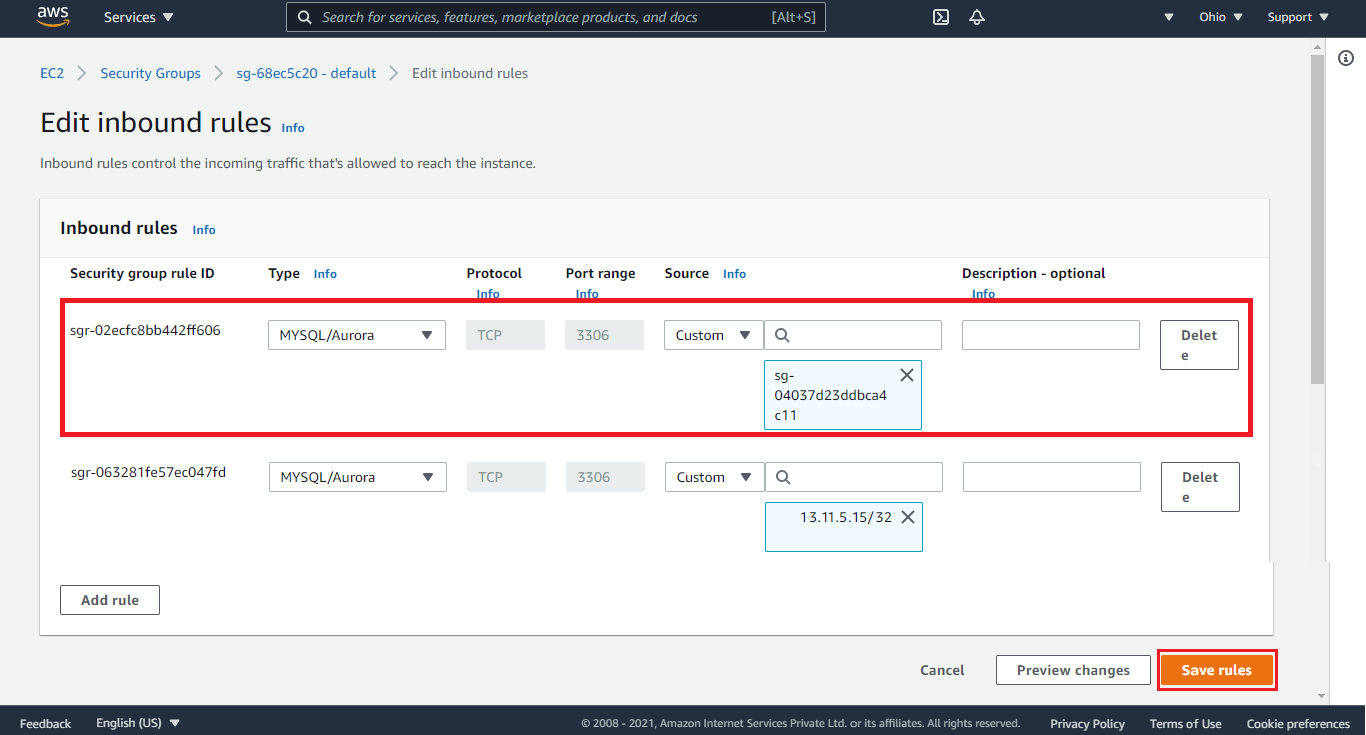
Step 3 - Edit inbound rules for the web app deployed on Elastic Beanstalk to access the Database
Edit inbound rules
Edit the inbound rules for the security group associated with your Elastic Beanstalk environment to allow access to the database.
Environment Overview
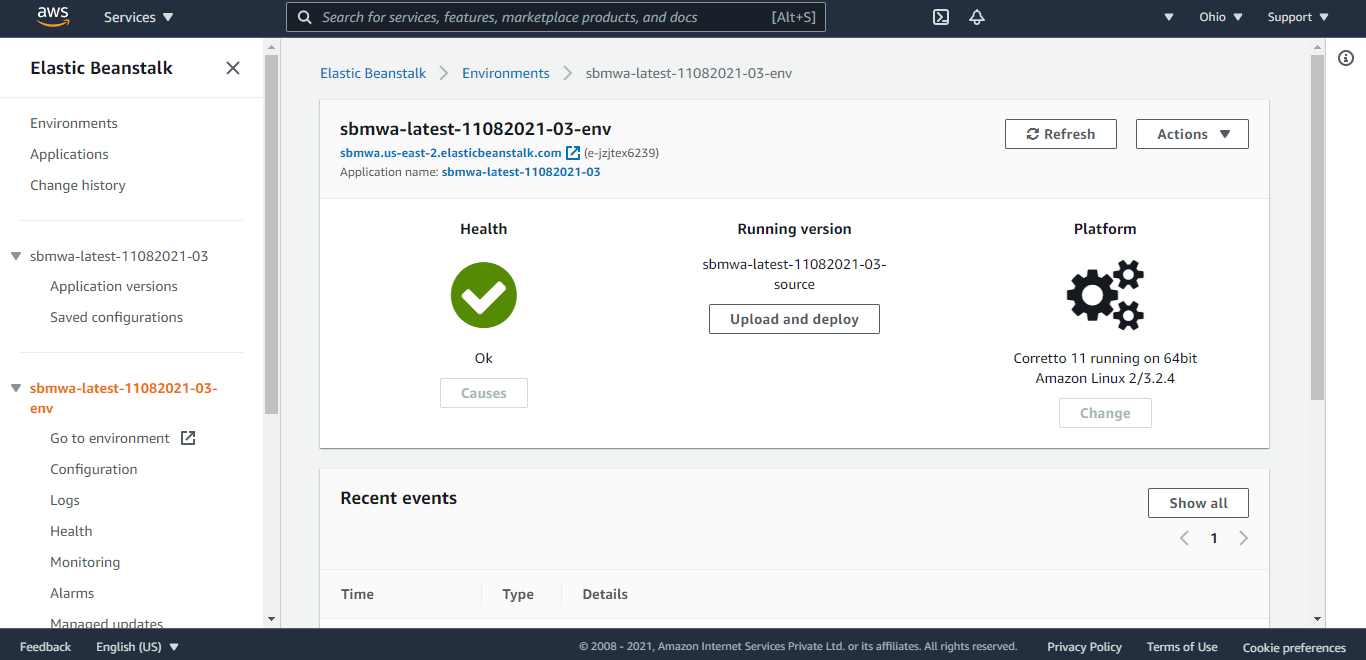
Step 4 - Environment setup complete
Once the environment setup is complete, navigate to the Elastic Beanstalk dashboard to view the details.
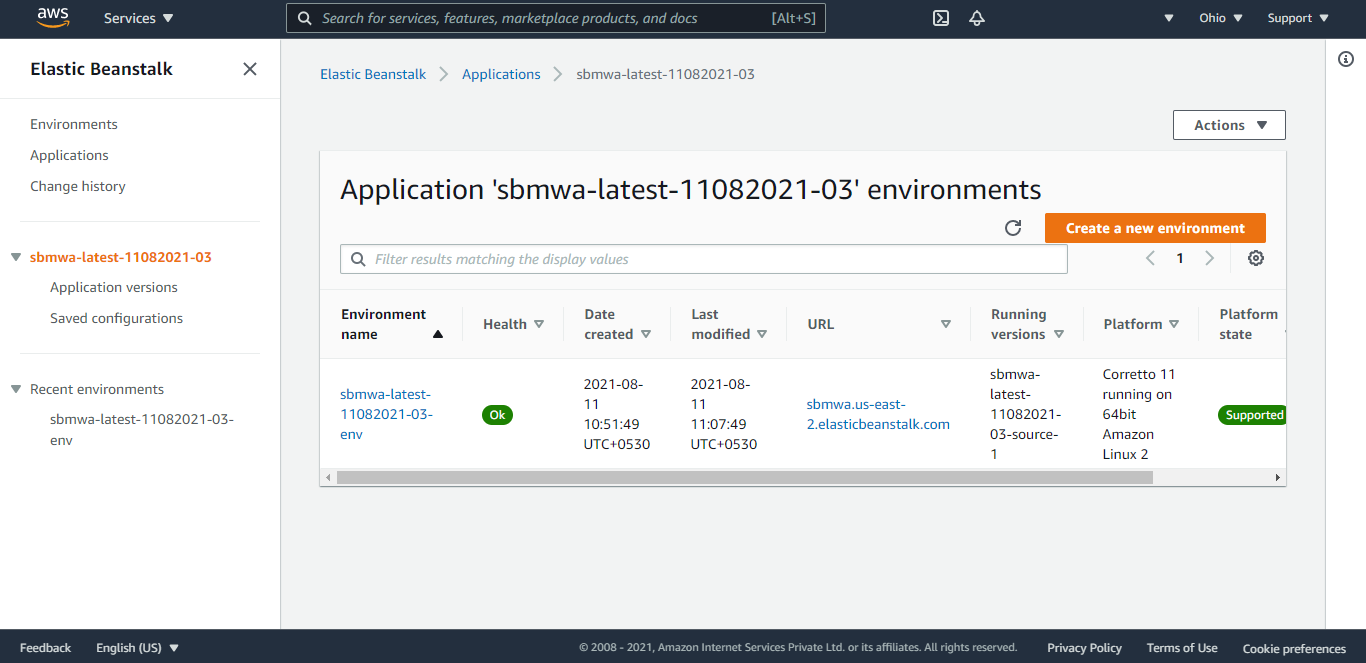
Step 4.1 - Application
Check the deployed application details to ensure it is running as expected.
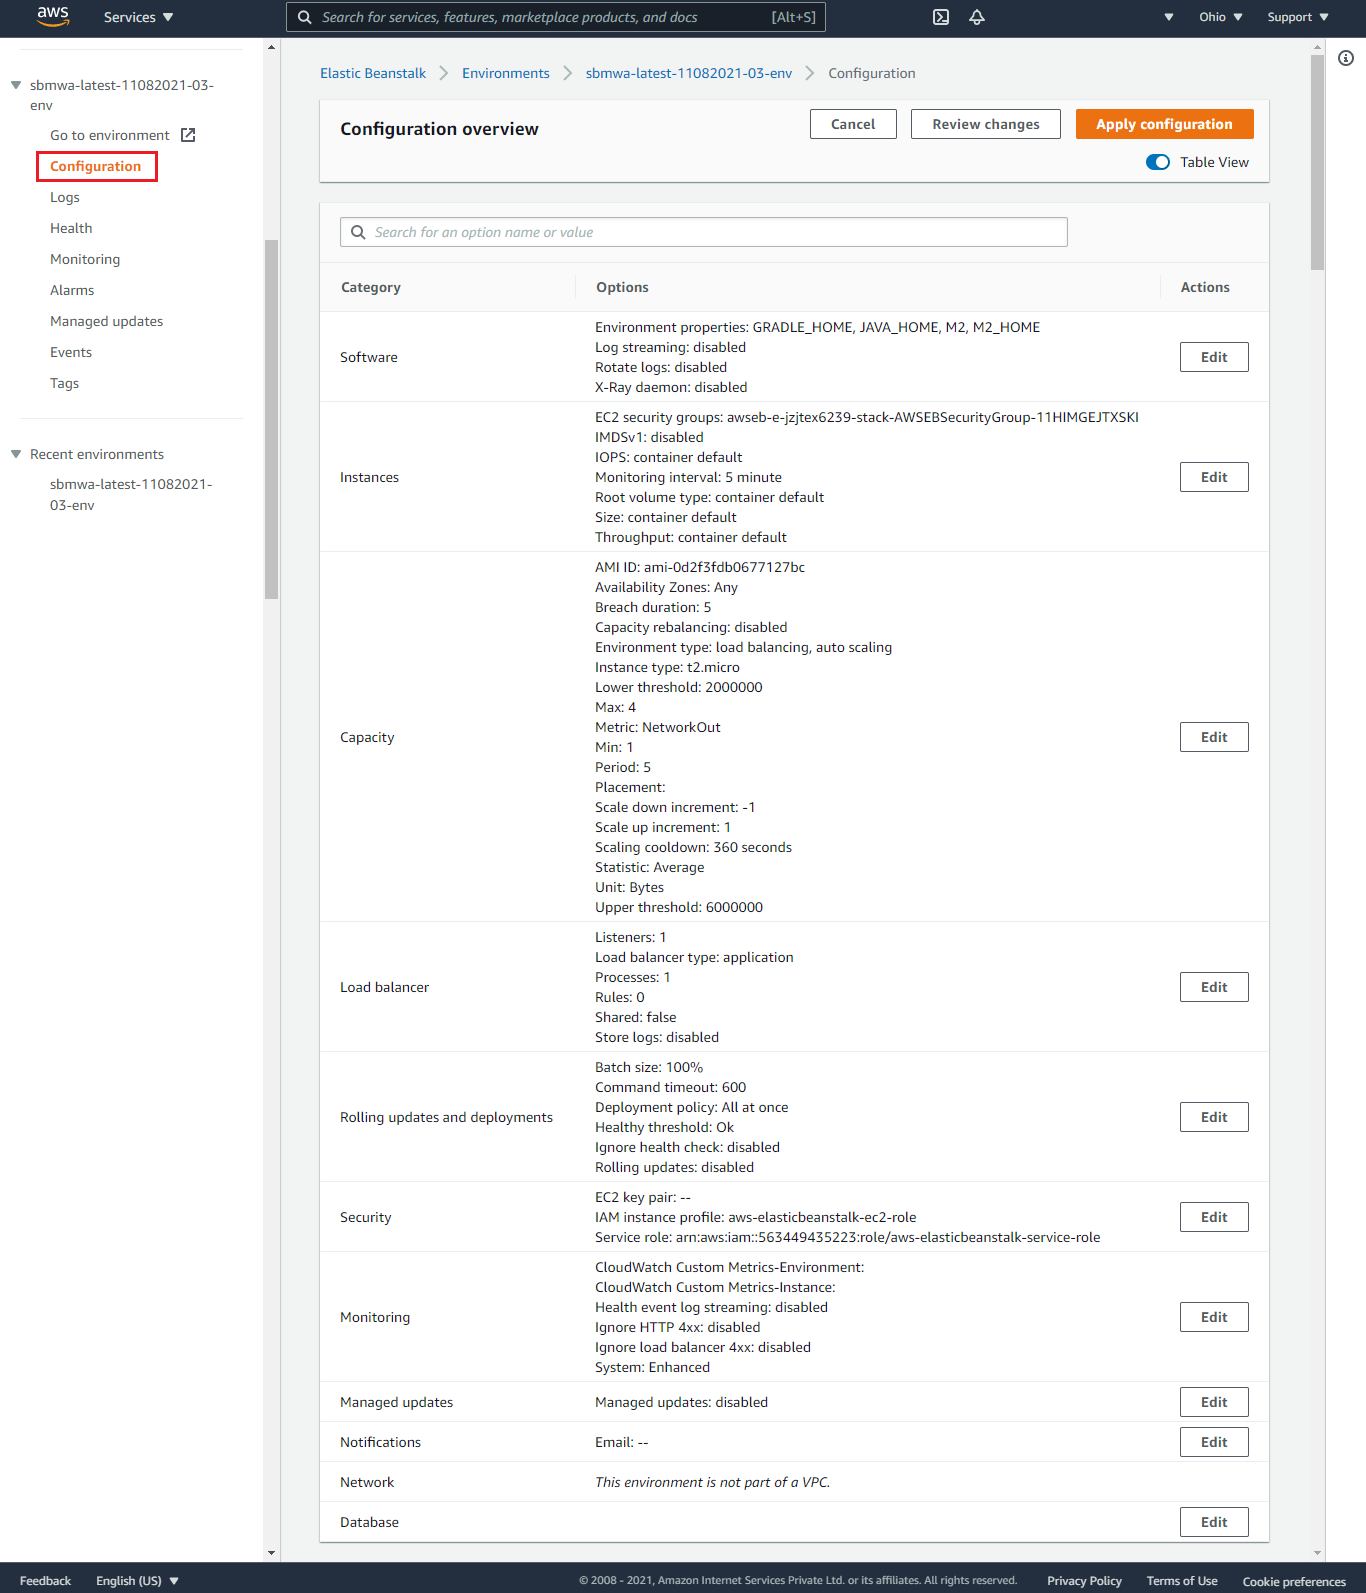
Step 4.2 - Configuration
Review and adjust the configuration settings for your environment.
Step 4.3 - Monitoring
Monitor the health and performance of the application.

Step 4.4 - Events
Review the event logs to track any issues or updates related to your environment.

Step 5 - Output
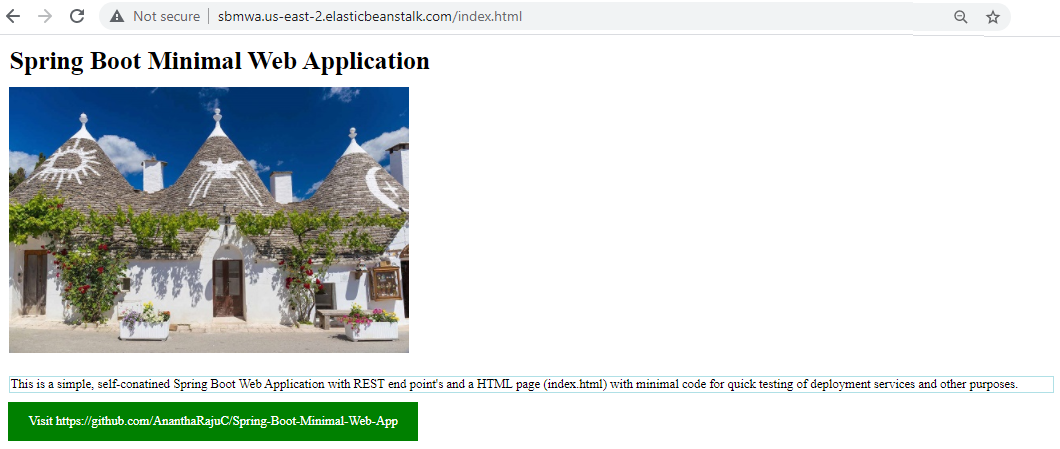
Step 5.1 - Web Page
Verify that your web application is accessible by navigating to the provided URL.
Step 5.2 - API Endpoint
Test the API endpoints to ensure they are functioning correctly.

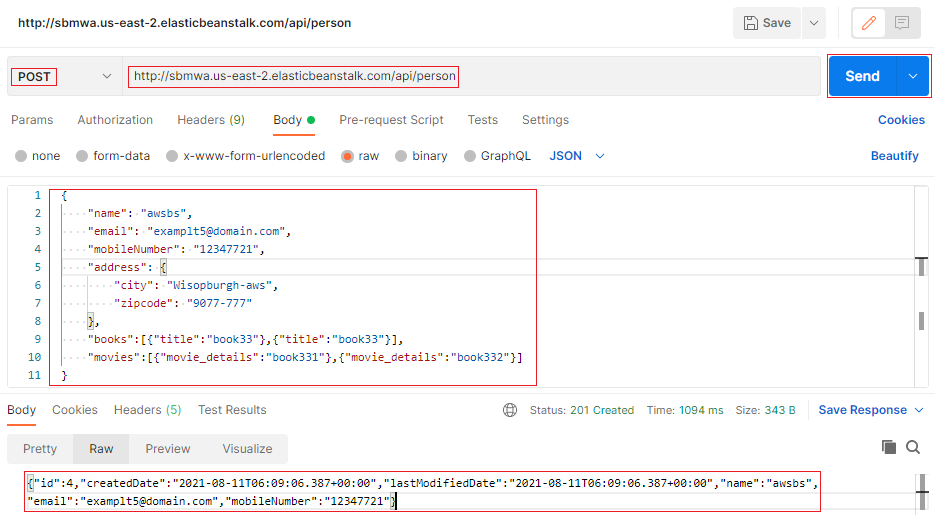
Step 5.3 - API In Action
Demonstrate the API in action by making sample requests and verifying the responses.
Step 6 - Cleanup
Step 6.1 - Terminate Environment
To avoid incurring charges for resources you are no longer using, terminate the Elastic Beanstalk environment.

Step 6.2 - Confirm Environment Termination
Confirm the environment termination to ensure all resources are properly cleaned up.

Conclusion
Deploying a Spring Boot application on AWS Elastic Beanstalk and connecting it to an AWS RDS MySQL database streamlines the process of managing infrastructure and scaling applications. AWS provides a robust set of tools to monitor, manage, and maintain your application, ensuring high availability and reliability. Following this guide, you can leverage these services to deploy and manage your Spring Boot applications.


