
Gitflow Workflow Branching Model
This post briefly captures the process of using Gitflow Workflow for version controlling a project. It is a development model introduced by Vincent Driessen which helps form an elegant mental model that is easy to comprehend and allows team members to develop a shared understanding of the branching strategy and releasing management processes.
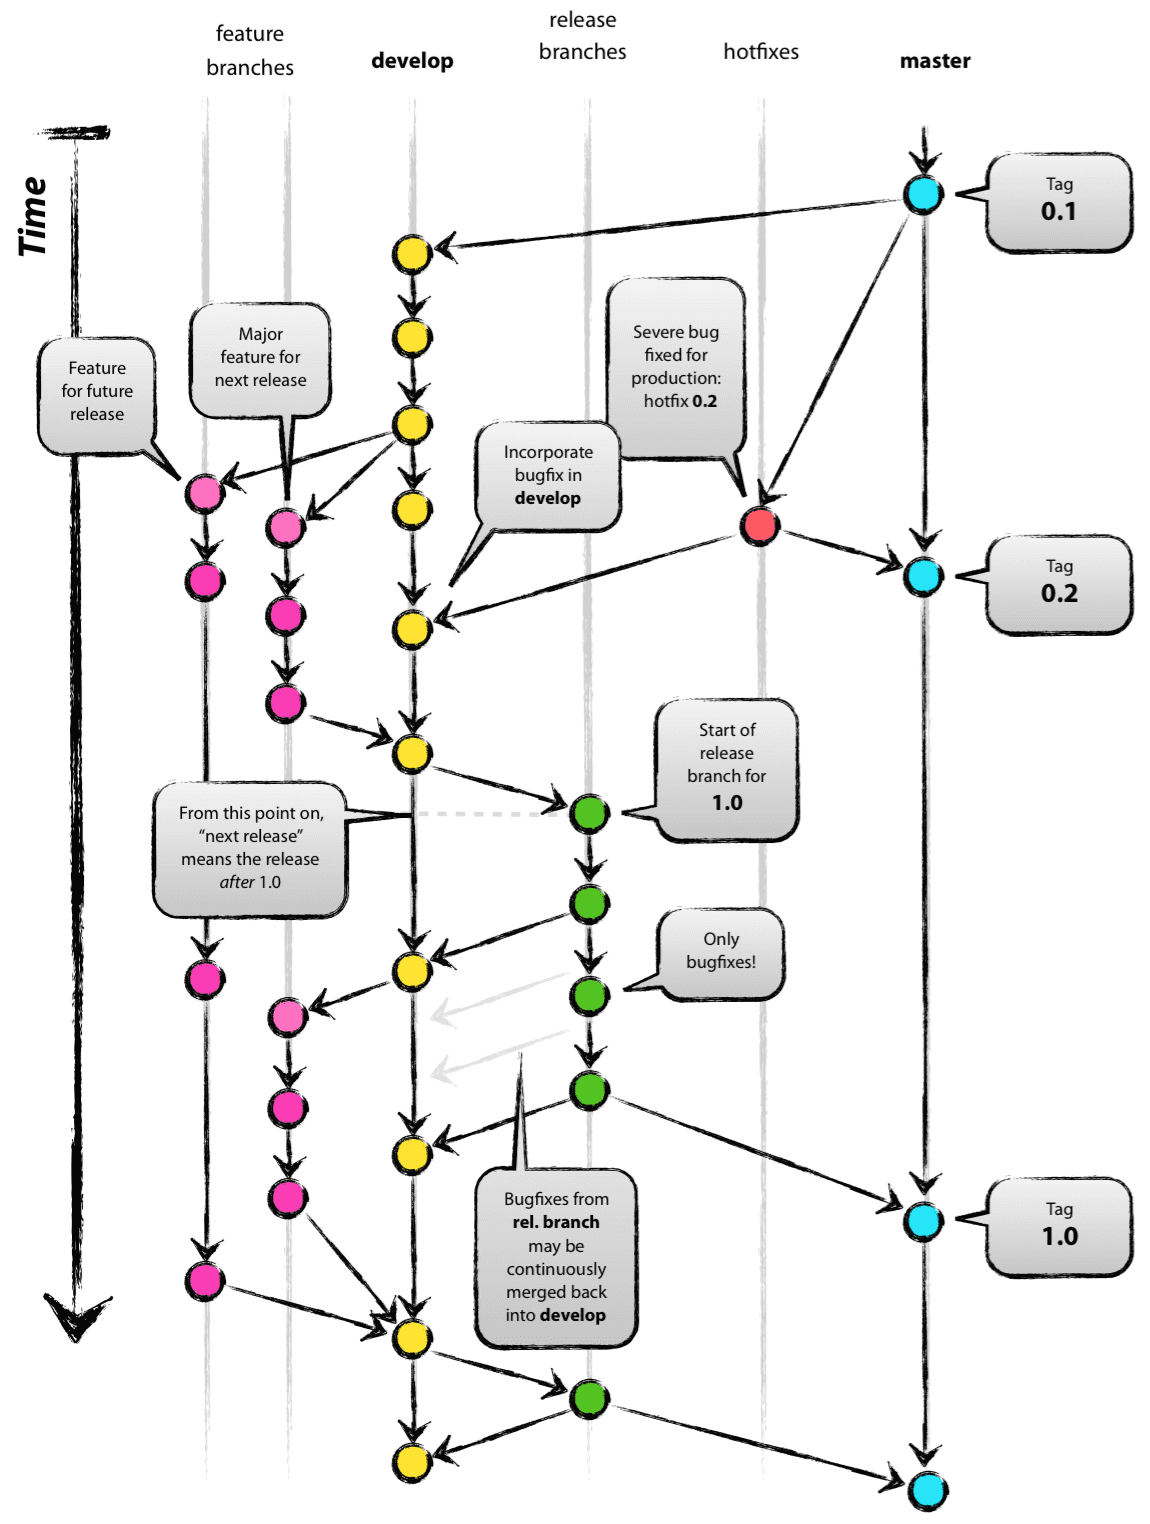
Read more about the model here, https://nvie.com/posts/a-successful-git-branching-model/.
Visual Representation of the idea behind the Gitflow Workflow:
Introduction
Git is software for tracking changes in any set of files, usually used for coordinating work among programmers collaboratively developing source code during software development. Its goals include speed, data integrity, and support for distributed, non-linear workflows.
Gitflow Workflow is a Git strategy that helps with continuous software development and implementing DevOps practices. It was first published and made popular by Vincent Driessen at nvie. The Gitflow Workflow defines a strict branching model designed around the project release. This provides a robust framework for managing larger projects.
Goals
- Clone a remote git repository
- Create DEVELOP branch
- Create/checkout FEATURE branch
- Integrate featureBranch branch with the main code-line
- Release code from develop branch
- Create a tag representing the release
Minimum Software Requirements
STEP 1 - clone a remote git repository
- git clone
clone a remote git repository to a local system.
example -git clone https -//github.com/username/repository.git
STEP 2 - create DEVELOP branch - This is the main code-line
-
git checkout -b develop
create and switch to a branch called develop -
git push -u origin develop
links local develop branch with remote corresponding develop branch
push local branch to remote repository for the first time (first time only)
STEP 3 - create/checkout FEATURE branch
-
git checkout -b featureBranch
create and switch to a branch called featureBranch1.1 git add .
add or modify files1.2 git commit -m "ADD/MODIFY File/s"
commit changes -
git push -u origin featureBranch
links local branchName with remote corresponding branch
STEP 4 - integrate featureBranch branch with the main code-line i.e., the DEVELOP branch
-
git checkout develop
-
git pull
-
git merge featureBranch
-
git push
STEP 5 - release code from develop branch (Normally code is released from a dedicated release branch taken from develop). In this case assume develop contains valid releaseable code.
-
git checkout main
-
git pull
-
git merge develop
-
git push
STEP 6 - create a tag representing the release
A tag is a special branch which can be setup to read only, giving us the certainity to always have a branch we can go back to in-order to reproduce releaseable code
-
git tag "1.0.0.RELEASE" -m "Releasing version 1.0.0"
-
git push --tags


