
Creating a CI/CD Pipeline with Travis CI, GitHub and Docker Hub for Spring Boot based Web Application
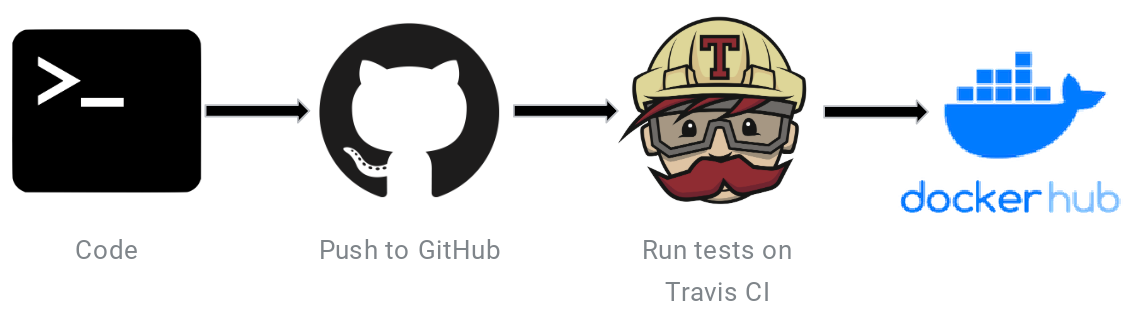
This post provides a step-by-step guide on how to automate the process of building a Spring Boot application Docker image using Travis CI and pushing the Docker image to Docker Hub. This process is triggered whenever code is pushed from a development machine to GitHub.
GitHub, Travis CI, and Docker Hub Overview
GitHub is a popular platform for Internet hosting, software development, and version control using Git. It offers distributed version control and source code management functionality, plus additional features to enhance collaboration and productivity.
Travis CI is a continuous integration service used to build and test software projects hosted on GitHub and Bitbucket. It automates the testing and deployment of your applications.
Docker Hub is a service provided by Docker for finding and sharing container images. It is the world’s largest repository of container images, containing content from various sources including community developers, open source projects, and independent software vendors.
Goals
- Developer pushes code to GitHub
- A job is triggered in Travis CI
- Travis CI builds Docker Image and pushes it to Docker Hub
Minimum Requirements
- Java
- Maven
- GitHub account (FREE)
- Travis CI account (FREE)
- dockerhub account (FREE)
Getting Started
Spring Boot Minimal Web App is the sample Spring Boot web application i've used to illustrate Integration Testing.
Navigate to http://localhost:8080/ to discover the application URLs.
In the application.properties file present in the resources folder, set the spring.profiles.active value to application-h2db since we will be running the tests before initiating the build process which is dependent on all the tests passing.
Note: mvn package -Dmaven.test.skip=true Command to build the project by skipping all tests.
Noticed an issue with this Sample Project? Open an issue or a PR on GitHub!
Step 1 - Add Dockerfile file to the project.
Create a Dockerfile in the root of your project to define the Docker image for your application.
Step 2 - Add .travis.yml file to the project.
Create a .travis.yml file to configure Travis CI for your project.
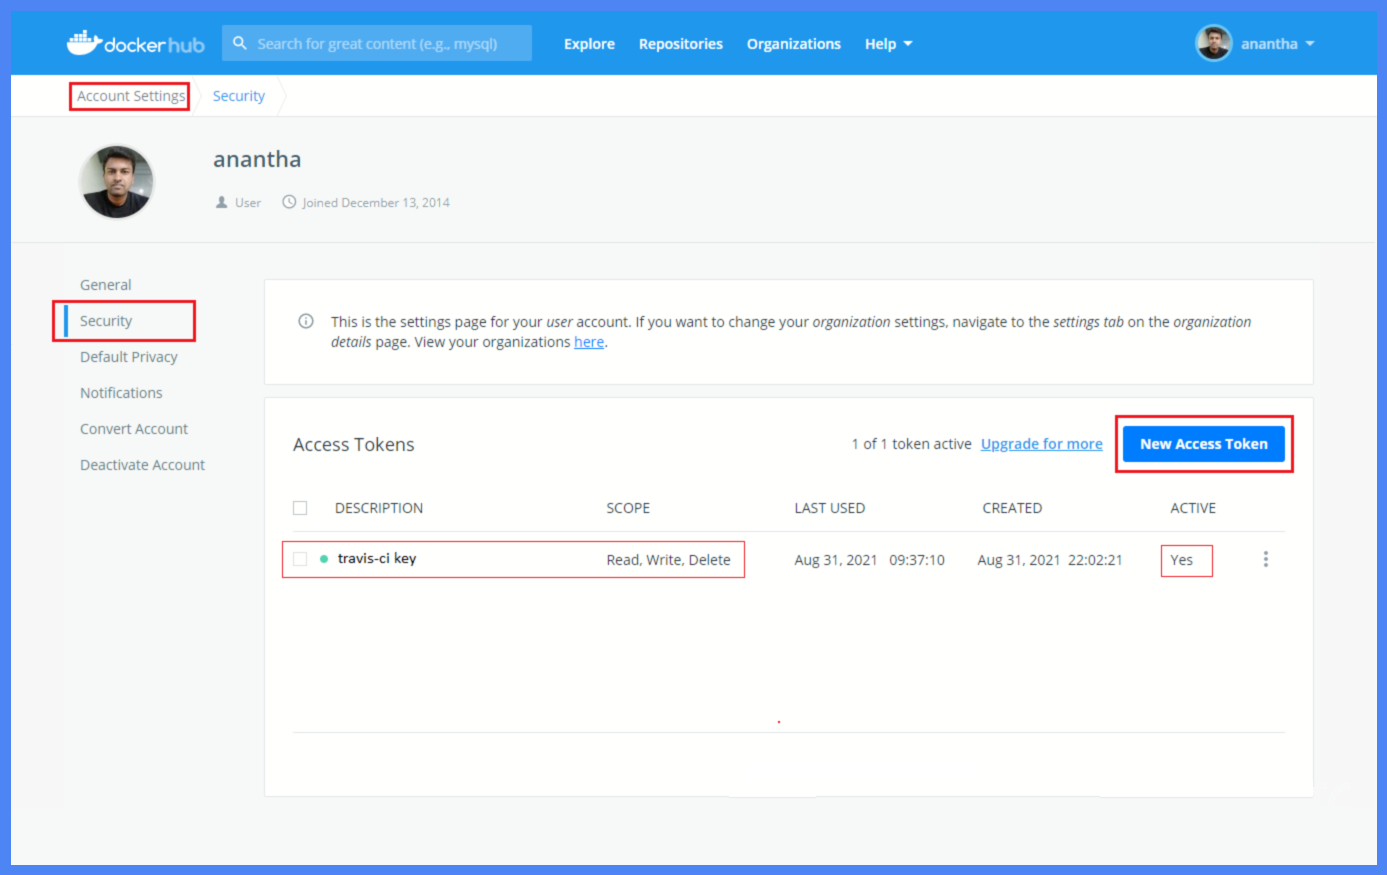
Step 3 - Generate Access Token from Docker Hub
-
In the Security section of your Docker Hub account Settings page, click on the New Access Token button
-
Generate a new access token with Read, Write, Delete scope.
-
If you prefer using an existing access token, use it.
Note : This access token will be used as the value for the DOCKER_PASS Environment Variables key.
Reference : https://docs.docker.com/docker-hub/access-tokens/#create-an-access-token
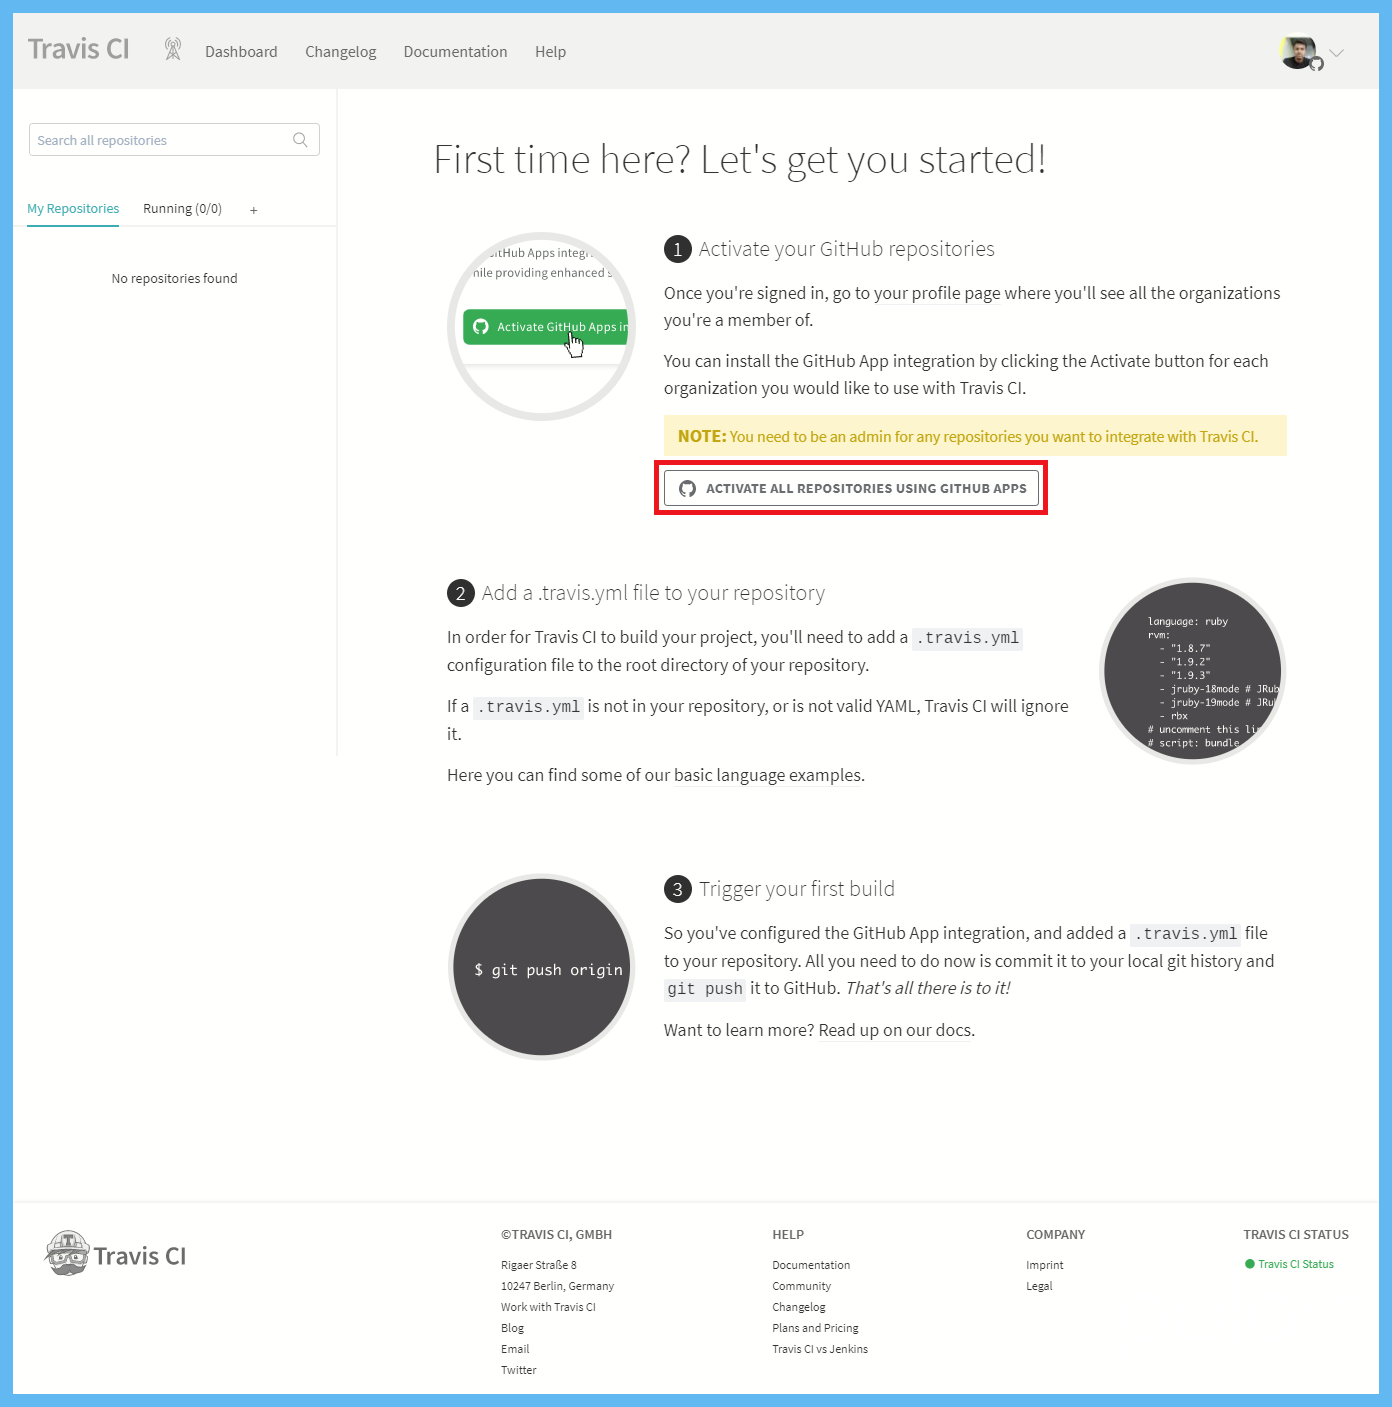
Step 4 - Activate GitHub Repository in Travis CI
- Login to https://app.travis-ci.com and activate the repository of interest.
- Approve & Install Travis CI on the selected repository.
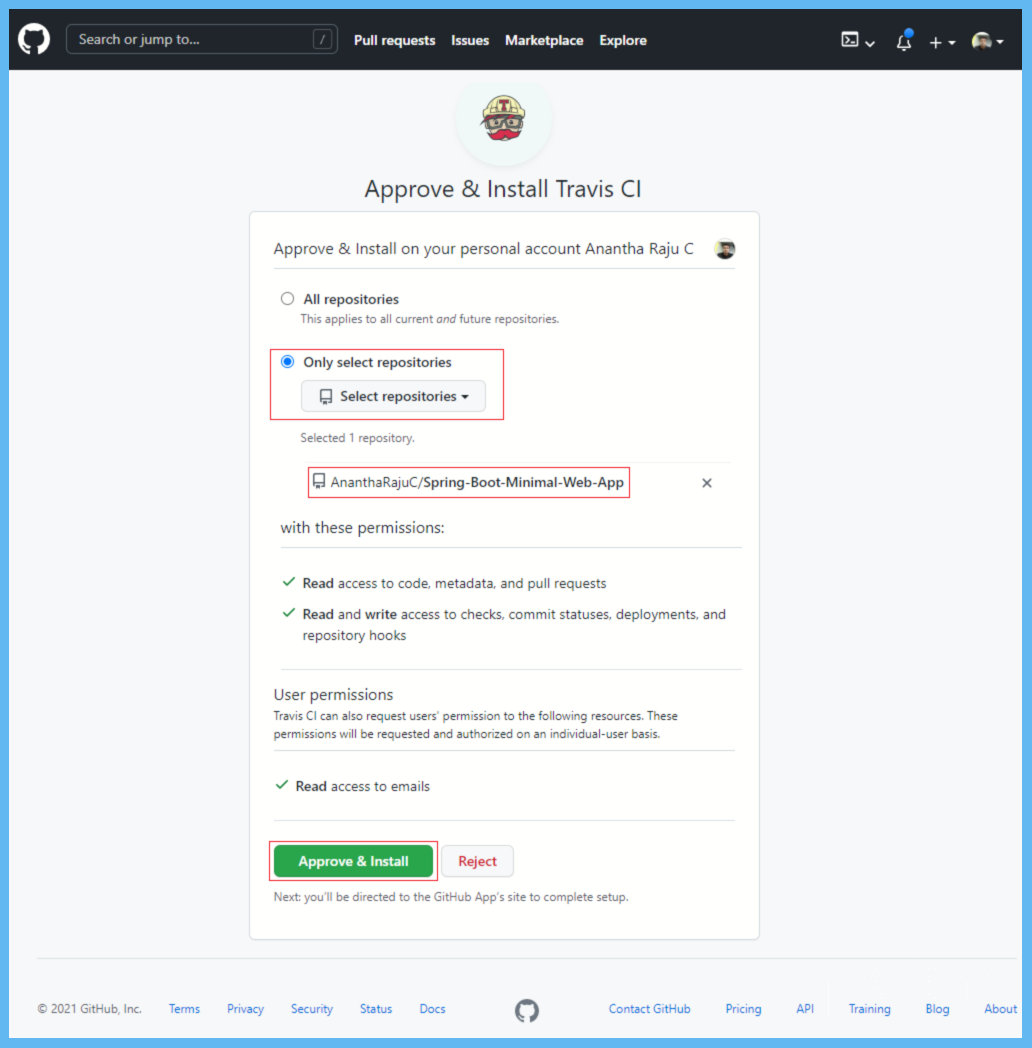
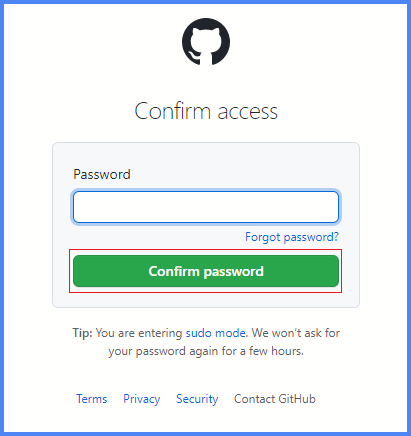
- Confirm Travis CI installation by entering the GitHub account password.
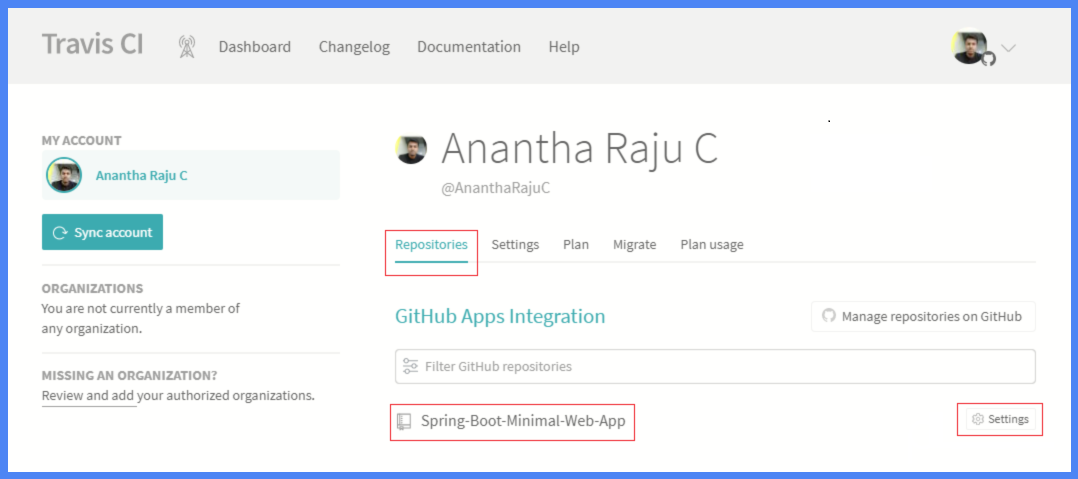
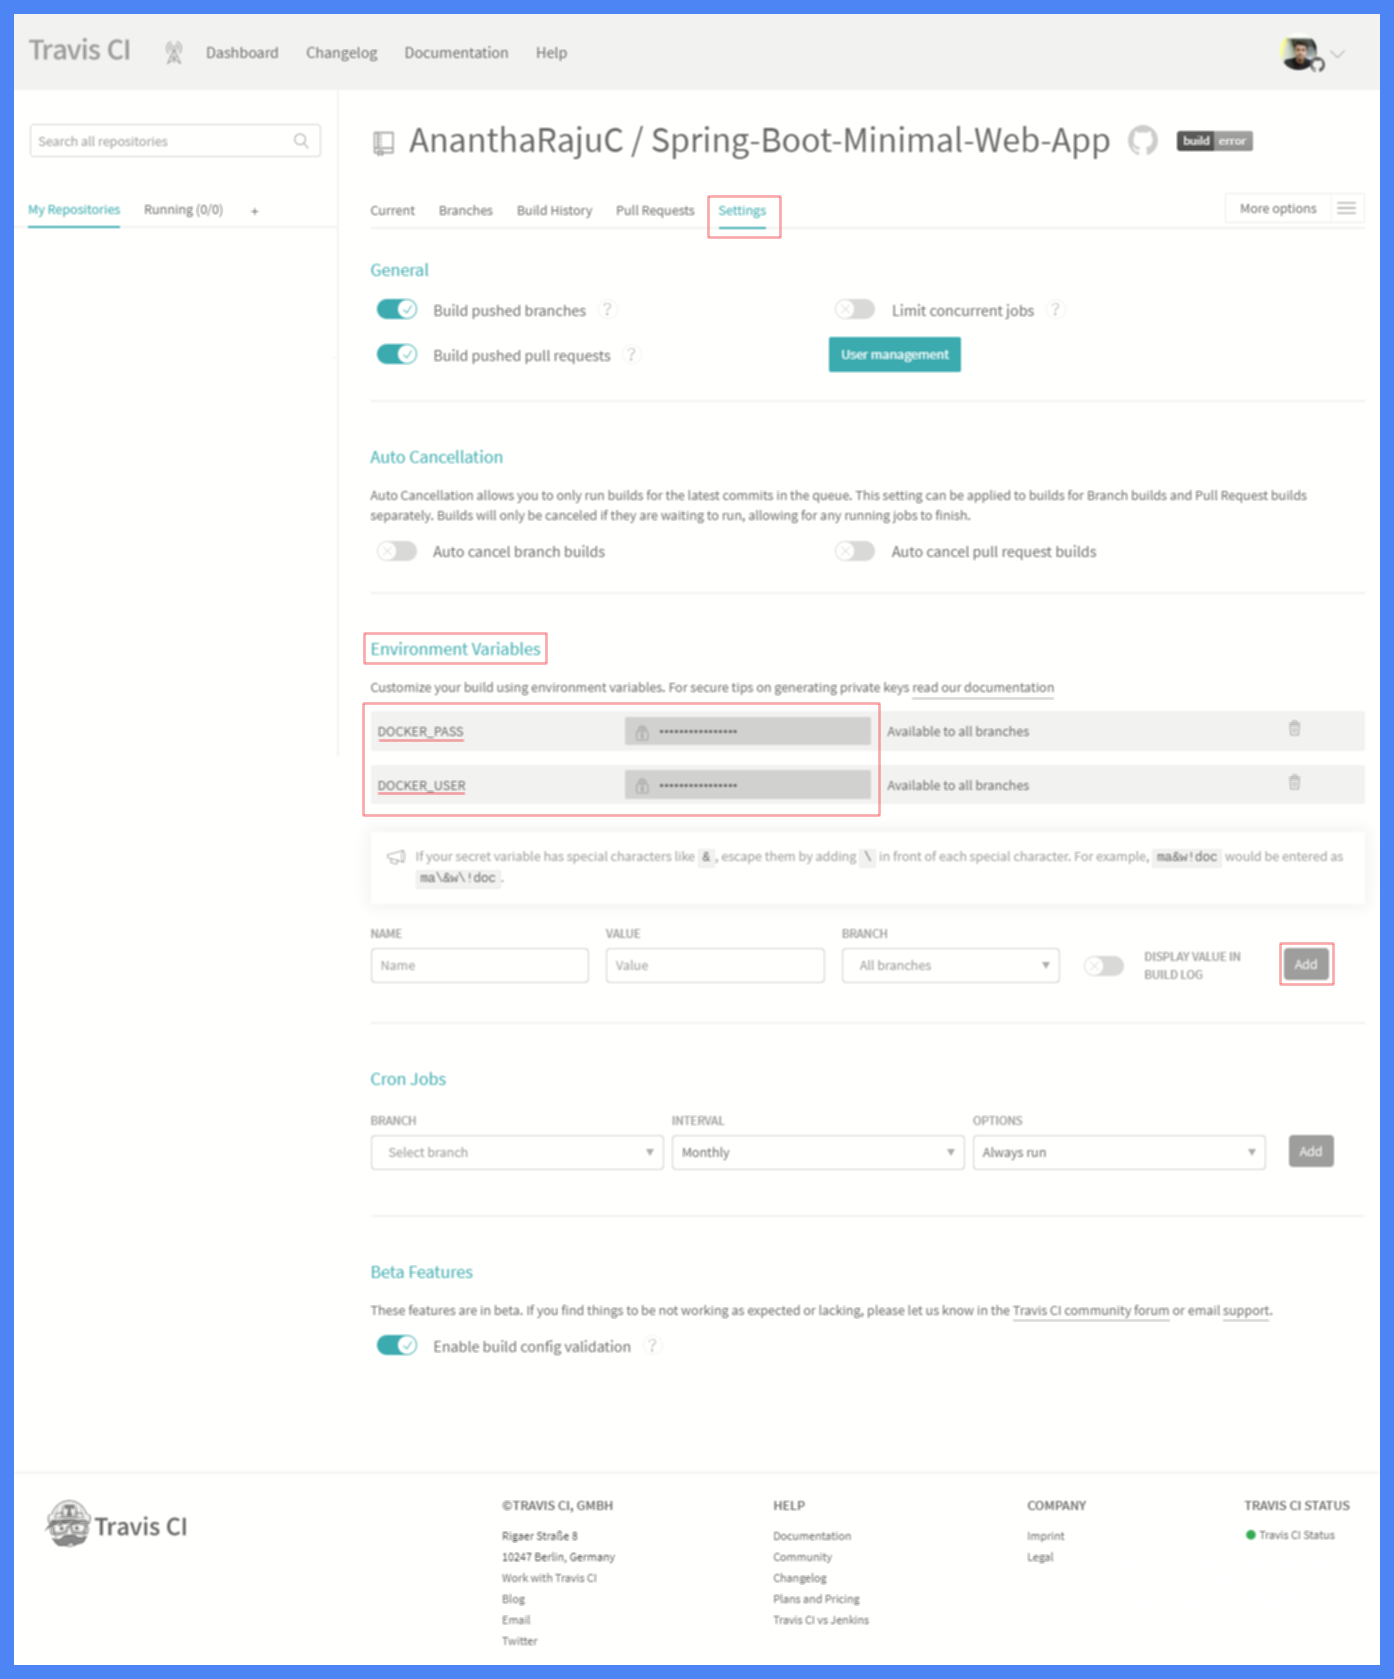
- In Travis CI dashboard, under the Repositories tab click on the settings button associated with the repository.
- In the Environment Variables section of Settings tab of the selected repository, add Docker Hub user details.
DOCKER_USER : YOUR_DOCKER_HUB_USERNAME
DOCKER_PASS : YOUR_DOCKER_HUB_ACCESS_TOKEN
Step 5 - Push Code to GitHub
Now that we've configured the sample Spring Boot Application with necessary files (Dockerfile, .travis.yml) and the required services (Travis CI, Docker Hub) with necessary environment variables and access tokens, we can push the code changes from our local development machine to our remote GitHub repository.
git push origin main
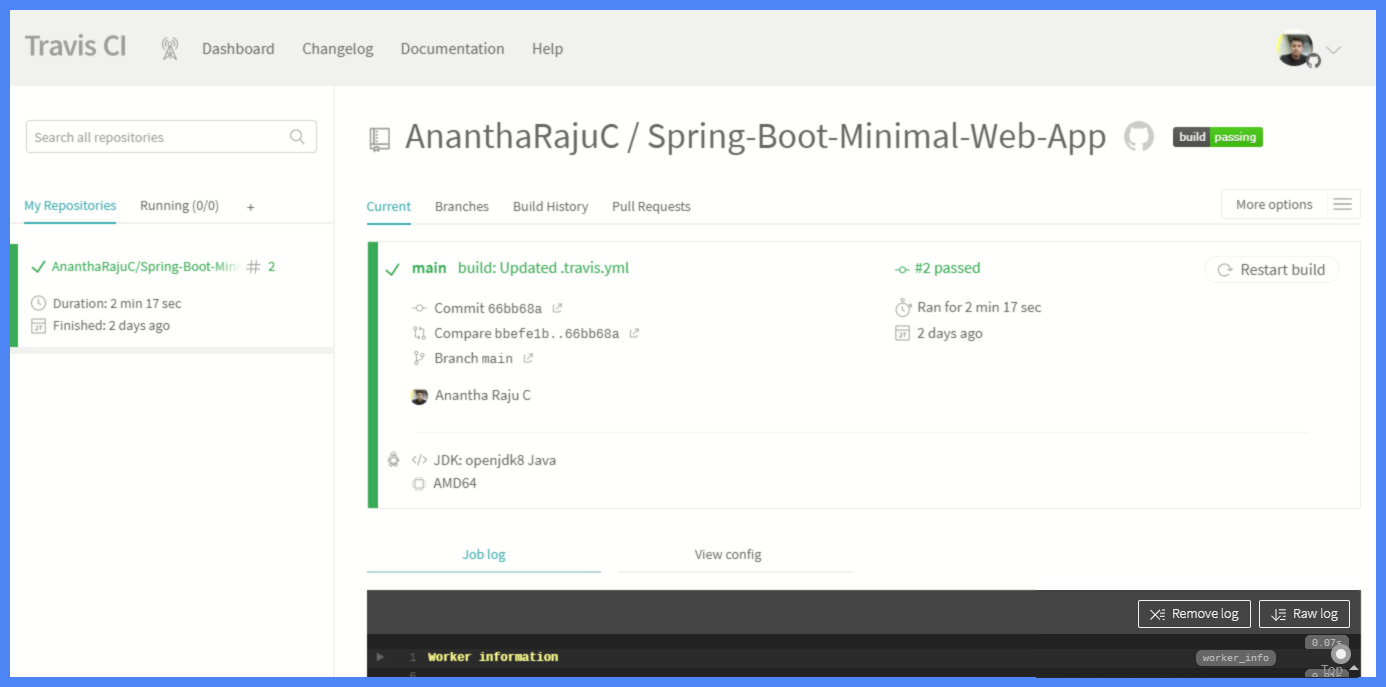
Outcome: Travis CI
We can now expect travis ci to run the tests, build the docker image of the application and push the same to dockerhub.
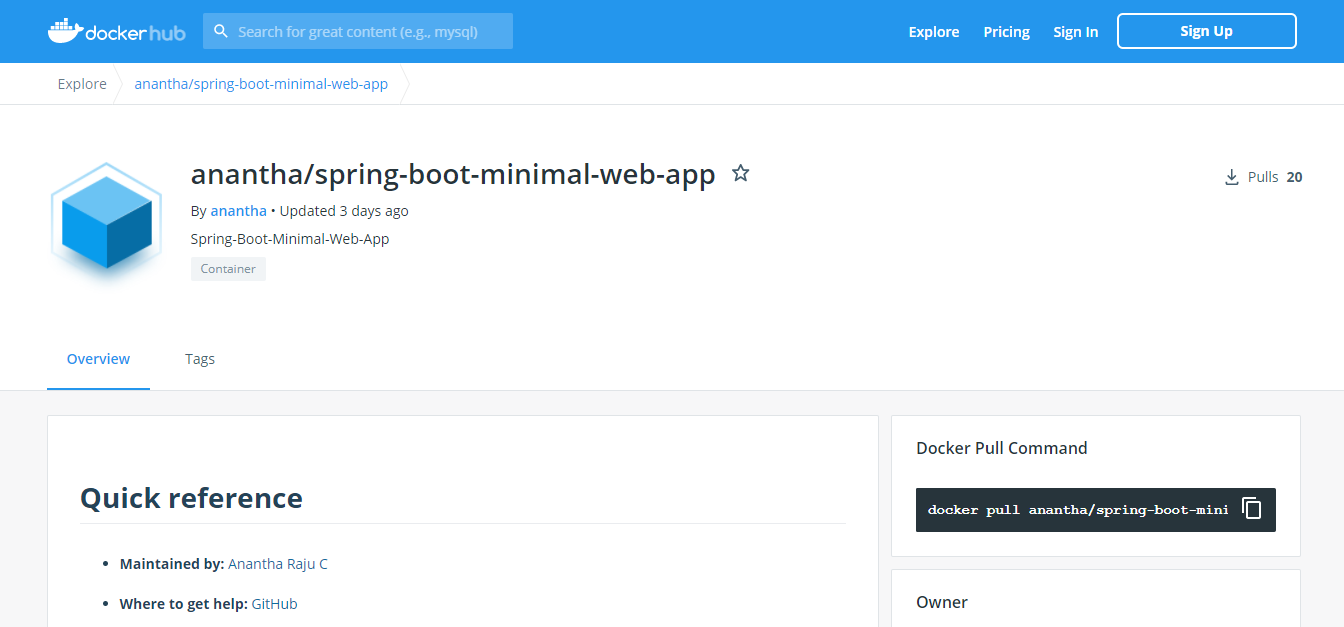
Outcome: Docker Hub
Finally, the lastest docker image of the application must be present in your docker hub registry.
Conclusion
By following this guide, you have successfully automated the process of building and deploying a Spring Boot application using Docker, Travis CI, and Docker Hub. This setup ensures that every time you push code to GitHub, Travis CI automatically builds the Docker image and pushes it to Docker Hub. This not only streamlines your development workflow but also ensures that your application is consistently built and deployed in a reliable and repeatable manner.
By leveraging these powerful tools, you can focus more on developing features and less on managing your deployment pipeline. This approach also allows for easy scaling and sharing of your application, as Docker images can be pulled and run anywhere.
Remember, continuous integration and continuous deployment (CI/CD) are critical practices in modern software development. They help maintain code quality, reduce integration issues, and enable faster delivery of features to users. Keep exploring and enhancing your CI/CD pipeline to adapt to your project's evolving needs.


