Change Data Capture (CDC) - MySQL
Introduction
Change Data Capture (CDC) is a powerful process that tracks and captures changes made to data in a database, delivering those changes in real-time to downstream processes or systems. This capability is crucial for maintaining data consistency across distributed systems, enabling real-time analytics, and more.
In this post, we will briefly document the process of setting up CDC with MySQL using various tools such as Docker, Kafka, and Debezium.
Minimum Software Requirements
Before we get started, ensure you have the following software installed on your machine:
- Docker: Used to containerize applications (MySQL, Zookeeper, Kafka, Debezium, schema-registry, kafka-ui, ksqldb-server, ksqldb-cli)
- Docker Compose: A tool for defining and running multi-container Docker applications.
- MySQL Database: : The relational database management system.
- MySQL Workbench: Or on any other MySQL database client/console.
MySQL Configuration (mysql.cnf)
To enable CDC on your MySQL database, you need to configure the MySQL server appropriately. Here’s an example of what your mysql.cnf file should look like:
[mysqld]
server-id         = 223344
log_bin           = mysql-bin
expire_logs_days  = 1
binlog_format     = row
server-id: A unique identifier for the server.log_bin: Enables binary logging.expire_logs_days: Specifies the number of days to retain binary logs.binlog_format: Sets the binary log format to 'row', which is necessary for CDC.
Sample Project Setup
Follow these steps to set up the CDC environment
1. Clone the repository
First, clone the repository containing the project setup:
git clone https://github.com/AnanthaRajuC/Streaming_ETL_pipeline_MySQL.git
cd Streaming_ETL_pipeline_MySQL
Running the application via docker compose
2. Pull all required docker images
Pull all the necessary Docker images defined in the Docker Compose file:
docker compose -f docker-compose.yaml pull
3. Start up the environment
Start the Docker containers. The first time you do this, the images will be downloaded from the remote server, which may take some time:
docker compose -f docker-compose.yaml up
You should see output indicating that various services are being created and started:
Creating network "streaming_etl_pipeline_mysql_webproxy" with driver "bridge"
Creating zookeeper ... done
Creating kafka     ... done
Creating debezium           ... done
Creating cp-schema-registry ... done
Creating kafka-connect-01   ... done
Creating ksqldb-server      ... done
Creating ksqldb-cli         ... done
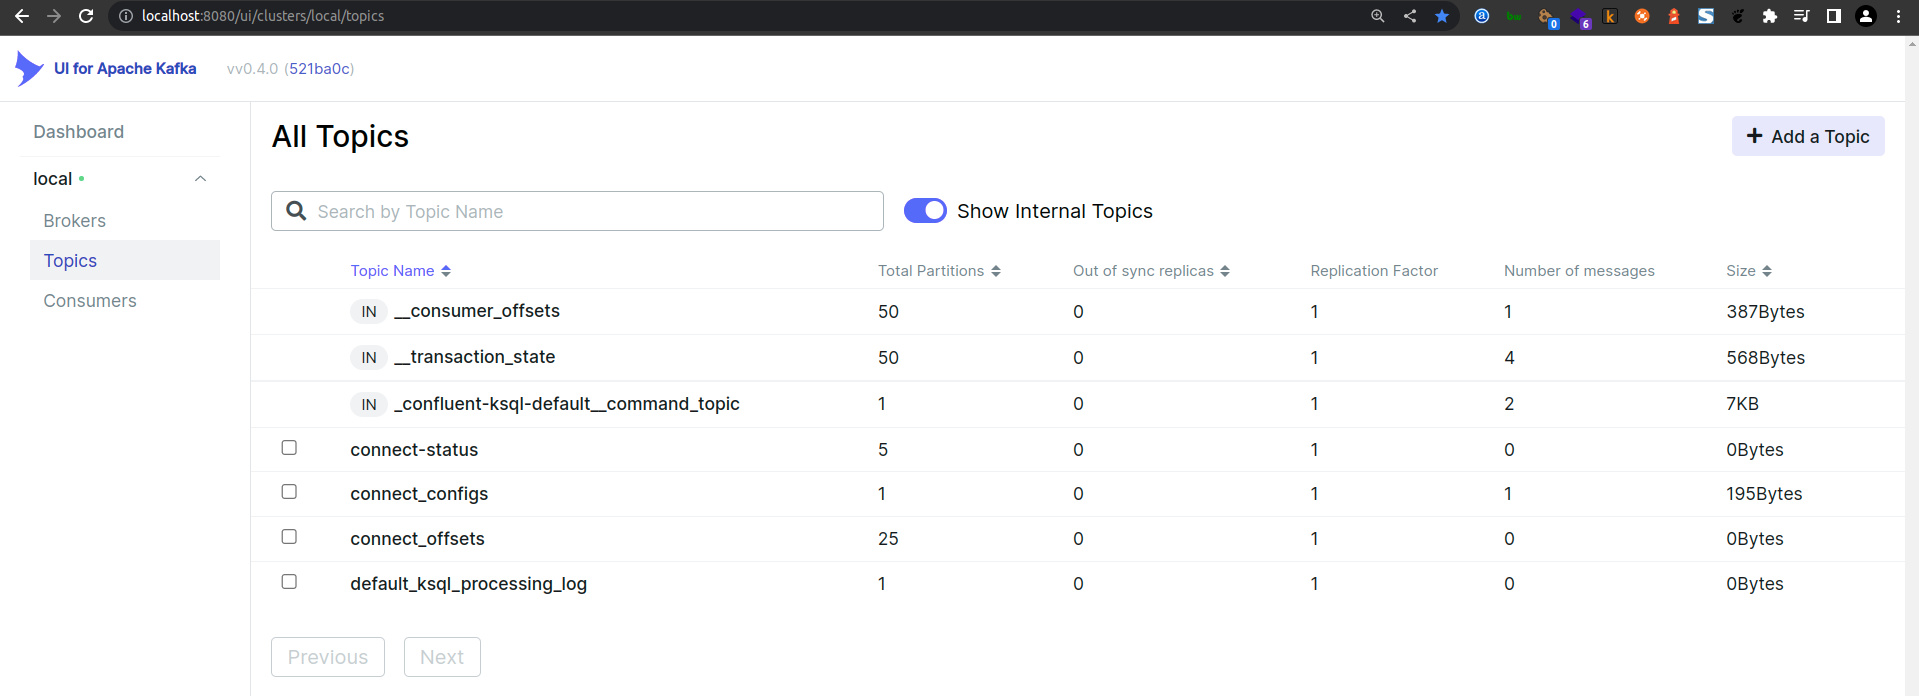
4. Accessing Kafka Topics via Kakfka-UI
Optionally, start Kafka UI, an open-source web UI for Apache Kafka Management
docker run --name=kafka-ui --network=streaming_etl_pipeline_mysql_webproxy -p 8080:8080 -e KAFKA_CLUSTERS_0_NAME=local -e KAFKA_CLUSTERS_0_BOOTSTRAPSERVERS=kafka:9092 -d provectuslabs/kafka-ui:latest
Access the Kafka-UI console at: http://localhost:8080

5. Verify Everything is Running
Ensure all containers are up and running:
docker ps

IMPORTANT: If any components do not show "Up" under the Status column (e.g., they say "Exit") then you must rectify this before continuing. As a first solution, try re-issuing the docker-compose up -d command.
6. Access ksqlDB via ksqlDB-CLI
Launch the KSQL CLI in another terminal window.
docker exec -it ksqldb-cli ksql http://ksqldb-server:8088

Tear down the stack
To stop and remove the containers, run:
docker stop kafka-ui
docker rm kafka-ui
Then, bring down the rest of the environment:
docker compose -f docker-compose.yaml down
You should see output indicating that the containers are being stopped and removed:
Stopping ksqldb-cli       ... done
Stopping ksqldb-server    ... done
Stopping kafka-connect-01 ... done
Stopping debezium         ... done
Stopping kafka            ... done
Stopping zookeeper        ... done
Removing ksqldb-cli         ... done
Removing ksqldb-server      ... done
Removing kafka-connect-01   ... done
Removing cp-schema-registry ... done
Removing debezium           ... done
Removing kafka              ... done
Removing zookeeper          ... done
Removing network streaming_etl_pipeline_mysql_webproxy
If you want to preserve the state of all containers, run docker-compose stop instead.
Initial MySQL preparation
To get started with our MySQL database, we'll set up the initial schema, tables, and populate them with sample data. This preparation is crucial for ensuring that our database is ready for further development and integration.
MySQL
1. Declare schema, user and permissions.
First, create a new schema and user, then grant the necessary permissions to the user.
-- create schema
CREATE SCHEMA streaming_etl_db;

-- use schema
USE streaming_etl_db;

-- Create user
CREATE USER 'debezium' IDENTIFIED WITH mysql_native_password BY 'Debezium@123#';

-- Grant privileges to user
GRANT SELECT, RELOAD, SHOW DATABASES, REPLICATION SLAVE, REPLICATION CLIENT ON *.* TO 'debezium';

-- Reload the grant tables in the mysql database enabling the changes to take effect without reloading or restarting mysql service
FLUSH PRIVILEGES;
2. Create Tables
Next, create the tables for storing geographical data, addresses, and personal information. Each table includes fields and constraints tailored to the data it will store.
-- Table for geographical data
CREATE TABLE `geo` (
  `id` bigint(20) NOT NULL AUTO_INCREMENT COMMENT 'Unique ID for each entry.',
  `uuid` VARCHAR(50) DEFAULT (uuid()),
  `created_date_time` datetime NOT NULL DEFAULT CURRENT_TIMESTAMP COMMENT 'Field representing the date the entity containing the field was created.',
  `last_modified_date_time` datetime DEFAULT CURRENT_TIMESTAMP ON UPDATE CURRENT_TIMESTAMP ,
  `lat` varchar(255) DEFAULT NULL,
  `lng` varchar(255) DEFAULT NULL,
  PRIMARY KEY (`id`)
) ENGINE=InnoDB AUTO_INCREMENT=1 DEFAULT CHARSET=utf8mb4 COMMENT='Application Log.';
-- Table for addresses
CREATE TABLE `address` (
  `id` bigint(20) NOT NULL AUTO_INCREMENT COMMENT 'Unique ID for each entry.',
  `uuid` VARCHAR(50) DEFAULT (uuid()),
  `created_date_time` datetime NOT NULL DEFAULT CURRENT_TIMESTAMP COMMENT 'Field representing the date the entity containing the field was created.',
  `last_modified_date_time` datetime DEFAULT CURRENT_TIMESTAMP ON UPDATE CURRENT_TIMESTAMP ,
  `city` varchar(255) DEFAULT NULL,
  `zipcode` varchar(255) DEFAULT NULL,
  `state` varchar(255) DEFAULT NULL,
  `geo_id` bigint(20) DEFAULT NULL,
  PRIMARY KEY (`id`),
  KEY `FK_geo_id` (`geo_id`),
  CONSTRAINT `FKC_geo_id` FOREIGN KEY (`geo_id`) REFERENCES `geo` (`id`)
) ENGINE=InnoDB DEFAULT CHARSET=utf8mb4 COLLATE=utf8mb4_0900_ai_ci;
-- Table for personal information
CREATE TABLE `person` (
  `id` bigint(20) NOT NULL AUTO_INCREMENT COMMENT 'Unique ID for each entry.',
  `uuid` VARCHAR(50) DEFAULT (uuid()),
  `created_date_time` datetime NOT NULL DEFAULT CURRENT_TIMESTAMP COMMENT 'Field representing the date the entity containing the field was created.',
  `last_modified_date_time` datetime DEFAULT CURRENT_TIMESTAMP ON UPDATE CURRENT_TIMESTAMP ,
  `first_name` varchar(255) NOT NULL,
  `last_name` varchar(255) DEFAULT NULL,
  `email` varchar(255) DEFAULT NULL,
  `gender` varchar(255) DEFAULT NULL,
  `registration` datetime DEFAULT NULL,
  `age` int DEFAULT NULL,
  `address_id` bigint(20) DEFAULT NULL,
  PRIMARY KEY (`id`),
  KEY `FK_address_id` (`address_id`),
  CONSTRAINT `FKC_address_id` FOREIGN KEY (`address_id`) REFERENCES `address` (`id`)
) ENGINE=InnoDB DEFAULT CHARSET=utf8mb4 COLLATE=utf8mb4_0900_ai_ci;
3. Insert Sample Data
Populate the tables with some sample data to verify the structure and relationships.
-- Insert sample data into geo table
INSERT INTO `streaming_etl_db`.`geo`(`lat`,`lng`)VALUES('la14','lo14');

-- Insert sample data into address table
INSERT INTO `streaming_etl_db`.`address`(`city`,`zipcode`,`state`,`geo_id`)VALUES('c14','z14','s14',1);

-- Insert sample data into person table
INSERT INTO `streaming_etl_db`.`person`(`first_name`,`last_name`,`email`,`gender`,`registration`,`age`,`address_id`)VALUES('fn14','ln14','example@domain.com','M',now(),34,1);
4. Select Statements
Retrieve data from the tables to ensure everything is set up correctly.
-- Join query to retrieve data from person, address, and geo tables
SELECT *
FROM streaming_etl_db.person p
LEFT JOIN streaming_etl_db.address a on a.id = p.address_id
LEFT JOIN streaming_etl_db.geo g on g.id = a.geo_id;
-- Select all data from person table
SELECT * FROM streaming_etl_db.person;

-- Select all data from address table
SELECT * FROM streaming_etl_db.address;
By following these steps, you will have a fully prepared MySQL database with the necessary schema, tables, and sample data. This setup will serve as a foundation for further development and data integration.
Debezium Registration
In this section, we'll set up and register the Debezium connector to monitor changes in our MySQL database and stream them to Kafka. Debezium is an open-source distributed platform for change data capture (CDC).
Registering the Debezium Connector
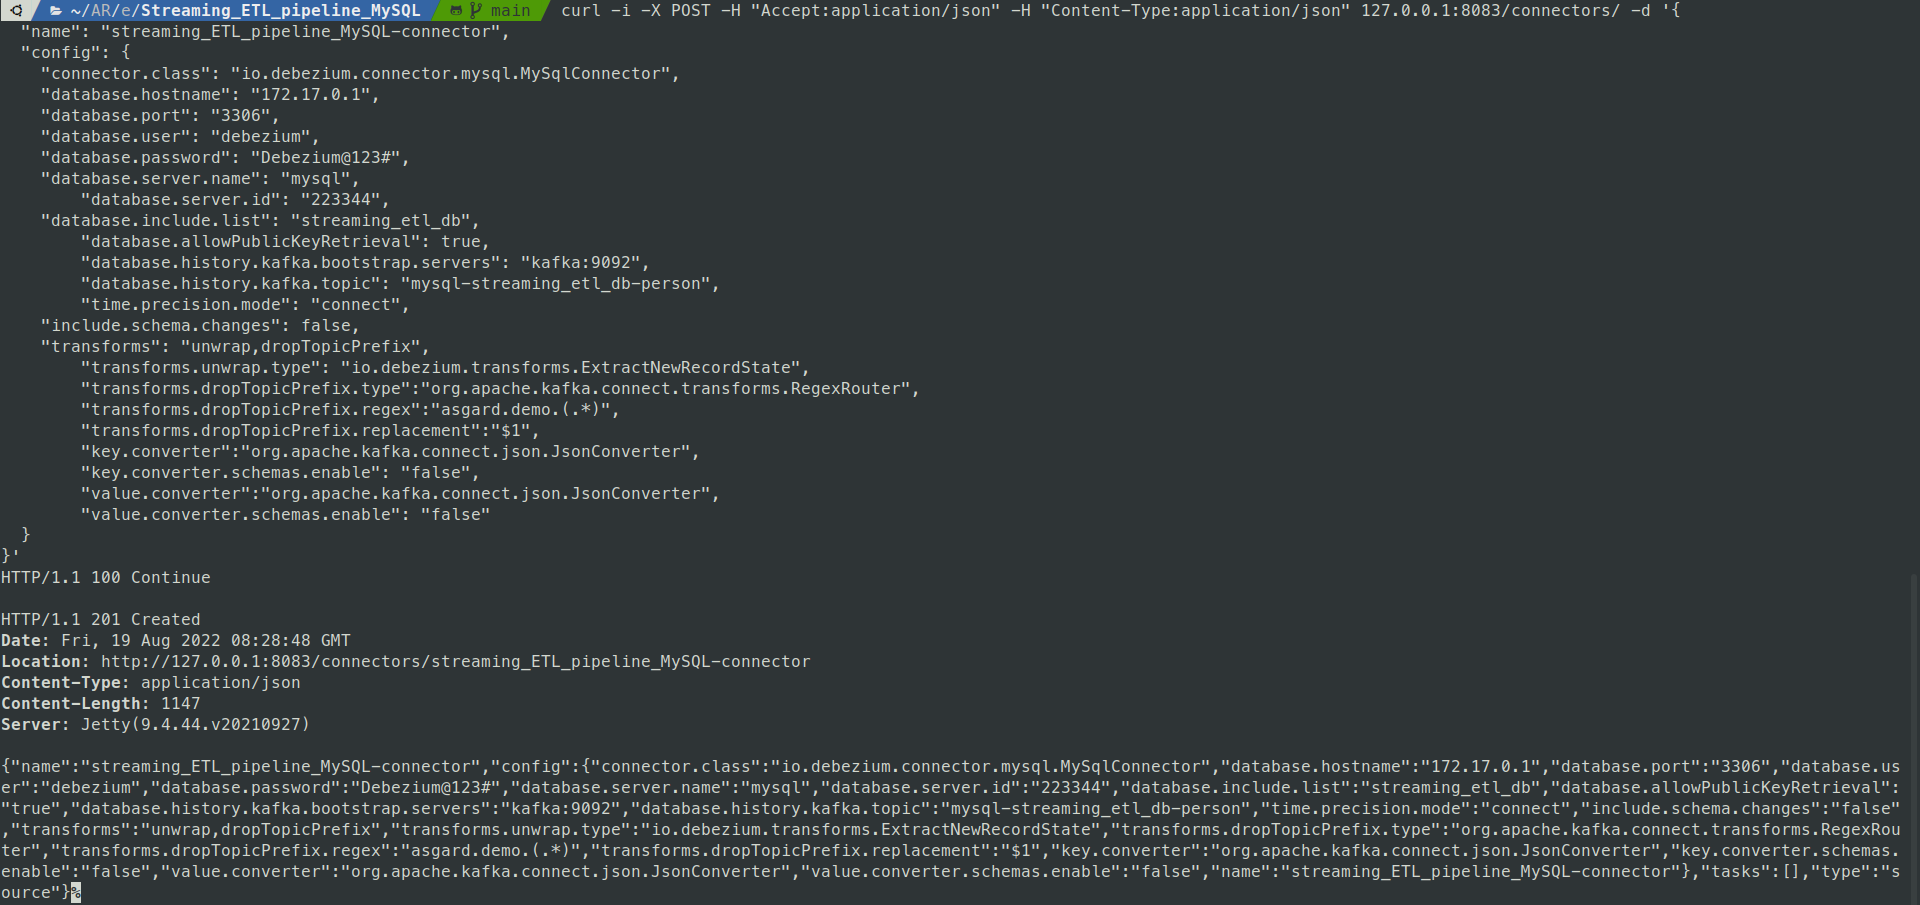
To register the Debezium connector, use the following curl command.
curl -i -X POST -H "Accept:application/json" -H "Content-Type:application/json" 127.0.0.1:8083/connectors/ -d '{
  "name": "streaming_ETL_pipeline_MySQL-connector",
  "config": {
    "connector.class": "io.debezium.connector.mysql.MySqlConnector",
    "database.hostname": "172.17.0.1",
    "database.port": "3306",
    "database.user": "debezium",
    "database.password": "Debezium@123#",
    "database.server.name": "mysql",
	  "database.server.id": "223344",
    "database.include.list": "streaming_etl_db",
	  "database.allowPublicKeyRetrieval": true,
	  "database.history.kafka.bootstrap.servers": "kafka:9092",
	  "database.history.kafka.topic": "mysql-streaming_etl_db-person",
	  "time.precision.mode": "connect",
    "include.schema.changes": false,
    "transforms": "unwrap,dropTopicPrefix",
	  "transforms.unwrap.type": "io.debezium.transforms.ExtractNewRecordState",
	  "transforms.dropTopicPrefix.type":"org.apache.kafka.connect.transforms.RegexRouter",
	  "transforms.dropTopicPrefix.regex":"asgard.demo.(.*)",
	  "transforms.dropTopicPrefix.replacement":"$1",
	  "key.converter":"org.apache.kafka.connect.json.JsonConverter",
	  "key.converter.schemas.enable": "false",
	  "value.converter":"org.apache.kafka.connect.json.JsonConverter",
	  "value.converter.schemas.enable": "false"
  }
}'
This command will:
- Create a new connector named streaming_ETL_pipeline_MySQL-connector.
- Configure it to monitor the streaming_etl_db schema on the MySQL instance.
- Stream the change data to a Kafka topic named mysql-streaming_etl_db-person.

After registering the Debezium connector, you can check the status and information of the connectors.
Checking Connector Status
To verify the status of the connectors, visit:
http://localhost:8083/connectors?expand=info&expand=status

To check the status of the specific Debezium connector, visit:
http://localhost:8083/connectors/streaming_ETL_pipeline_MySQL-connector/status

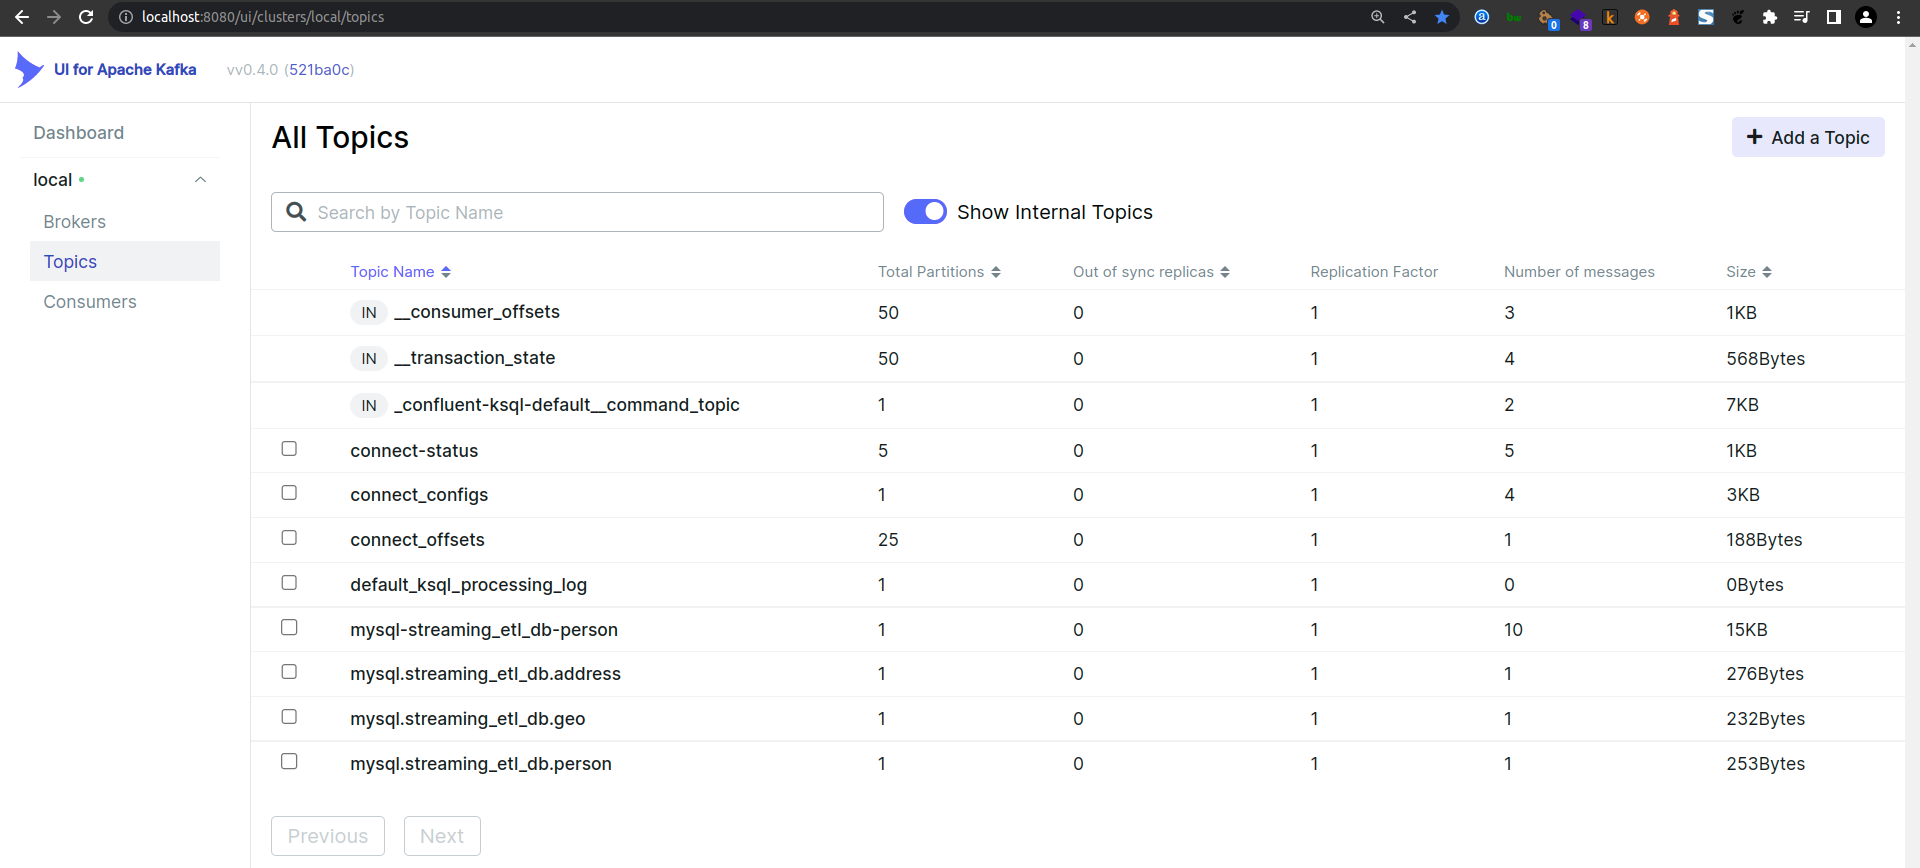
Kafka UI
You can also use the Kafka UI to inspect the topics and messages being streamed. Visit the Kafka UI at:

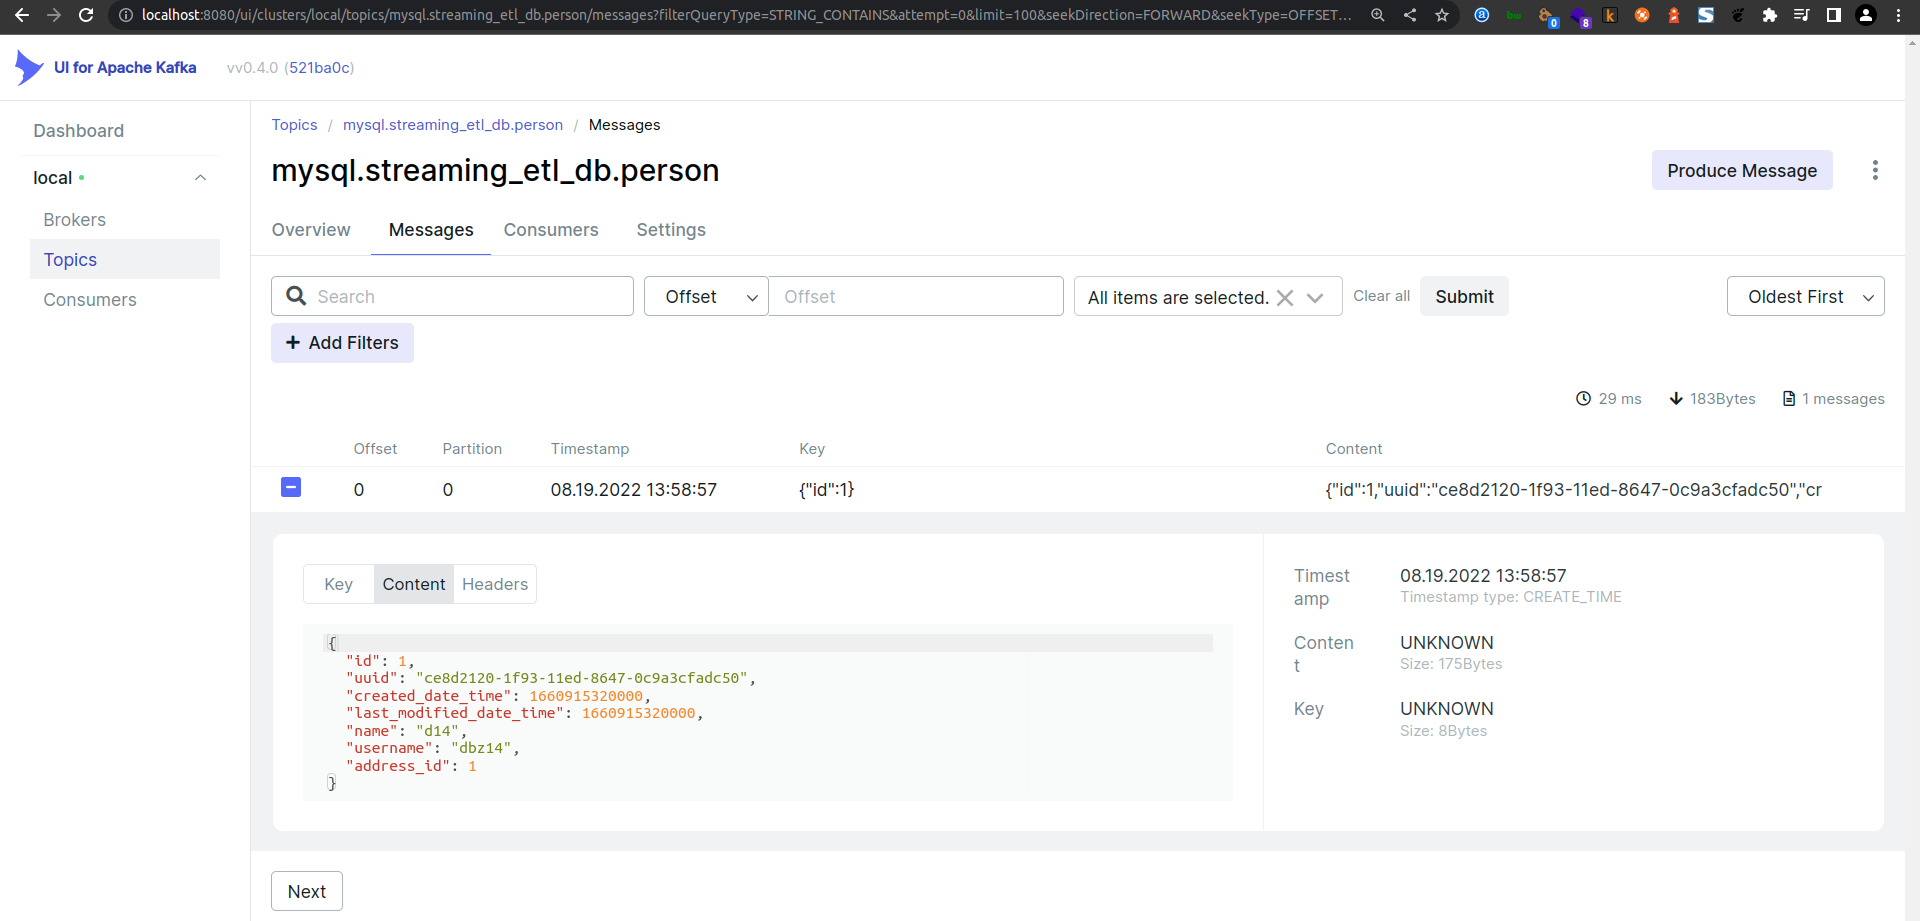
Viewing the Person Topic
Finally, check the messages in the person topic to ensure data is being streamed correctly:

Accessing ksqlDb via ksqldb-cli
In this section, we will explore how to access and use ksqlDB via the ksqlDB-CLI to interact with Kafka topics, create streams, perform stream-stream joins, and finally, sink the enriched stream back to MySQL.
Checking Topics, Streams, and Tables
Start by checking the available topics, streams, and tables in ksqlDB.
-- Display available topics
SHOW TOPICS;

-- Display available streams
SHOW STREAMS;

-- Display available tables
SHOW TABLES;
Declaring Streams
To begin processing data, declare the necessary streams. Set the offset to the earliest to ensure you capture all existing messages.
-- Set offset to the earliest
SET 'auto.offset.reset' = 'earliest';
Create streams to capture data from the Kafka topics corresponding to the MySQL tables.
-- Create stream for the person topic
CREATE STREAM PERSON_STREAM (
  id BIGINT,
  uuid VARCHAR,
  created_date_time TIMESTAMP,
  last_modified_date_time TIMESTAMP,
  name VARCHAR,
  username VARCHAR,
  address_id BIGINT
) WITH (KAFKA_TOPIC='mysql.streaming_etl_db.person', VALUE_FORMAT='JSON');
-- Create stream for the address topic
CREATE STREAM ADDRESS_STREAM (
  id BIGINT,
  uuid VARCHAR,
  created_date_time TIMESTAMP,
  last_modified_date_time TIMESTAMP,
  city VARCHAR,
  street VARCHAR,
  suite VARCHAR,
  zipcode VARCHAR,
  geo_id BIGINT
) WITH (KAFKA_TOPIC='mysql.streaming_etl_db.address', VALUE_FORMAT='JSON');
Querying Streams
Retrieve data from the streams to ensure they are correctly set up.
-- Select a single record from the PERSON_STREAM
SELECT * FROM PERSON_STREAM EMIT CHANGES LIMIT 1;
+-------------------------+-------------------------+-------------------------+-------------------------+-------------------------+-------------------------+-------------------------+
|ID                       |UUID                     |CREATED_DATE_TIME        |LAST_MODIFIED_DATE_TIME  |NAME                     |USERNAME                 |ADDRESS_ID               |
+-------------------------+-------------------------+-------------------------+-------------------------+-------------------------+-------------------------+-------------------------+
|1                        |ce8d2120-1f93-11ed-8647-0|2022-08-19T13:22:00.000  |2022-08-19T13:22:00.000  |d14                      |dbz14                    |1                        |
|                         |c9a3cfadc50              |                         |                         |                         |                         |                         |
Limit Reached
Query terminated
Describe the stream to get details about its schema.
-- Describe the PERSON_STREAM
DESCRIBE PERSON_STREAM;

-- Select all records from PERSON_STREAM
SELECT * FROM PERSON_STREAM;
Stream-Stream Join
Perform a join between the PERSON_STREAM and ADDRESS_STREAM to create an enriched stream combining data from both.
-- Create an enriched stream by joining PERSON_STREAM and ADDRESS_STREAM
CREATE STREAM PERSON_ADDRESS_ENRICHED_STREAM WITH (
FORMAT='JSON',
KAFKA_TOPIC='person_address_enriched',
PARTITIONS=1,
REPLICAS=1
) AS
SELECT
  P.ID P_ID,
  A.ID A_ID,
  P.NAME NAME,
  A.CITY CITY
FROM PERSON_STREAM P
LEFT OUTER JOIN ADDRESS_STREAM A WITHIN 1 HOURS GRACE PERIOD 30 MINUTES
ON ((A.ID = P.ADDRESS_ID))
EMIT CHANGES;
Kafka Sink MySQL DB
Finally, create a sink connector to write the enriched stream back to the MySQL database.
-- Create a sink connector for the enriched stream
CREATE SINK CONNECTOR SINK_PERSON_ADDRESS_ENRICHED_STREAM WITH (
  'connector.class'            = 'io.confluent.connect.jdbc.JdbcSinkConnector',
  'connection.url'             = 'jdbc:mysql://172.17.0.1:3306/',
  'connection.user'            = 'debezium',
  'connection.password'        = 'Debezium@123#',
  'topics'                     = 'PERSON_ADDRESS_ENRICHED_STREAM',
  'key.converter'              = 'org.apache.kafka.connect.json.JsonConverter',
  'key.converter.schemas.enable' = 'false',
  'value.converter'            = 'org.apache.kafka.connect.json.JsonConverter',
  'value.converter.schemas.enable' = 'false'
);
By following these steps, you can access ksqlDB via the ksqlDB-CLI, create and query streams, perform joins, and sink the enriched data back to MySQL.
Accessing ksqlDb via ksqldb-cli
In this section, we'll delve into how to access ksqlDB using the ksqlDB-CLI, focusing on creating and querying tables, and performing joins.
Checking Topics, Streams, and Tables
Start by listing the available topics, streams, and tables in your ksqlDB environment to ensure you have everything set up correctly.
-- Display available topics
SHOW TOPICS;

-- Display available streams
SHOW STREAMS;

-- Display available tables
SHOW TABLES;
Declaring Tables
Next, declare tables to represent your Kafka topics in ksqlDB. These tables will enable you to perform SQL-like queries on streaming data.
-- Create table for the person topic
CREATE TABLE PERSON (
  id BIGINT PRIMARY KEY,
  uuid VARCHAR,
  created_date_time TIMESTAMP,
  last_modified_date_time TIMESTAMP,
  name VARCHAR,
  username VARCHAR,
  address_id BIGINT
) WITH (KAFKA_TOPIC='mysql.streaming_etl_db.person', VALUE_FORMAT='JSON');

-- Create table for the address topic
CREATE TABLE ADDRESS (
  id BIGINT PRIMARY KEY,
  uuid VARCHAR,
  created_date_time TIMESTAMP,
  last_modified_date_time TIMESTAMP,
  city VARCHAR,
  street VARCHAR,
  suite VARCHAR,
  zipcode VARCHAR,
  geo_id BIGINT
) WITH (KAFKA_TOPIC='mysql.streaming_etl_db.address', VALUE_FORMAT='JSON');
Querying Tables
Retrieve data from the tables to verify that they are correctly set up and ingesting data from the corresponding Kafka topics.
-- Select a single record from the PERSON table
SELECT * FROM PERSON EMIT CHANGES LIMIT 1;

-- Select a single record from the ADDRESS table
SELECT * FROM ADDRESS EMIT CHANGES LIMIT 1;
Performing Joins
Join the PERSON and ADDRESS tables to enrich the data, combining fields from both tables based on a common key.
-- Perform a left join between PERSON and ADDRESS tables
SELECT
  P.NAME,
  A.CITY
FROM PERSON P
LEFT JOIN ADDRESS A
ON A.id = P.address_id
EMIT CHANGES
LIMIT 1;
-- Perform an inner join between PERSON and ADDRESS tables
SELECT
  P.NAME,
  A.CITY
FROM PERSON P
INNER JOIN ADDRESS A
ON A.id = P.address_id
EMIT CHANGES
LIMIT 1;
Creating Enriched Table
Create a new table to store the results of the join, providing a persistent view of the enriched data.
-- Create a table for the enriched person and address data
CREATE TABLE PERSON_ADDRESS_ENRICHED (
  P_ID BIGINT,
  A_ID BIGINT,
  NAME VARCHAR,
  CITY VARCHAR
) WITH (KAFKA_TOPIC='person_address_enriched', VALUE_FORMAT='JSON');
Managing Tables
You can also manage your tables by dropping them when they are no longer needed.
-- Drop the PERSON table if it exists
DROP TABLE IF EXISTS PERSON;
By following these steps, you can effectively use ksqlDB to create and manage tables, perform joins, and enrich your streaming data, enabling powerful real-time data processing capabilities in your ETL pipeline.
Conclusion
In this tutorial, we walked through the process of setting up a streaming ETL pipeline using MySQL, Debezium, Kafka, and ksqlDB. We began by preparing our MySQL database with the necessary schema, tables, and sample data. Then, we registered the Debezium connector to monitor changes and stream them to Kafka. Using ksqlDB, we created and queried streams and tables, performed joins to enrich our data, and finally, sank the enriched data back into MySQL.
By leveraging these powerful tools, you can build robust and scalable real-time data processing pipelines that enable you to respond to changes in your data as they happen. This setup provides a foundation for more complex stream processing tasks and opens up possibilities for real-time analytics, monitoring, and more.
